How to Build a Floor Over Dirt

Building a floor over dirt can be an economical way to add additional living space to your home. Whether you’re looking to create a basement or need more storage room, building a floor over dirt is possible with the right materials and tools. Not only does it provide extra space for whatever purpose you desire, but it also adds value to your house if done correctly.

Planning ahead is essential before beginning any major project like this one since there are several factors that must be taken into consideration such as soil composition, moisture levels, and desired end results. In this blog post, we’ll discuss how to best go about constructing a new floor over dirt quickly and easily so you can start enjoying your newly expanded living space sooner rather than later!

  • Step 1: Remove Topsoil – Use a shovel to remove the top layer of soil from the area where you want to build your floor
  • Make sure that the area is clear of all vegetation, rocks, and debris before proceeding
  • Step 2: Level Ground – Level out the ground with a rake so that it’s as even as possible
  • If there are any large bumps or dips in the surface, use sand or soil to fill them in until you have an even surface
  • Step 3: Lay Down Vapor Barrier – Spread down a vapor barrier over the leveled dirt and ensure that it covers every inch of space evenly
  • This will help protect against moisture seeping up through your flooring material and causing damage later on down the line
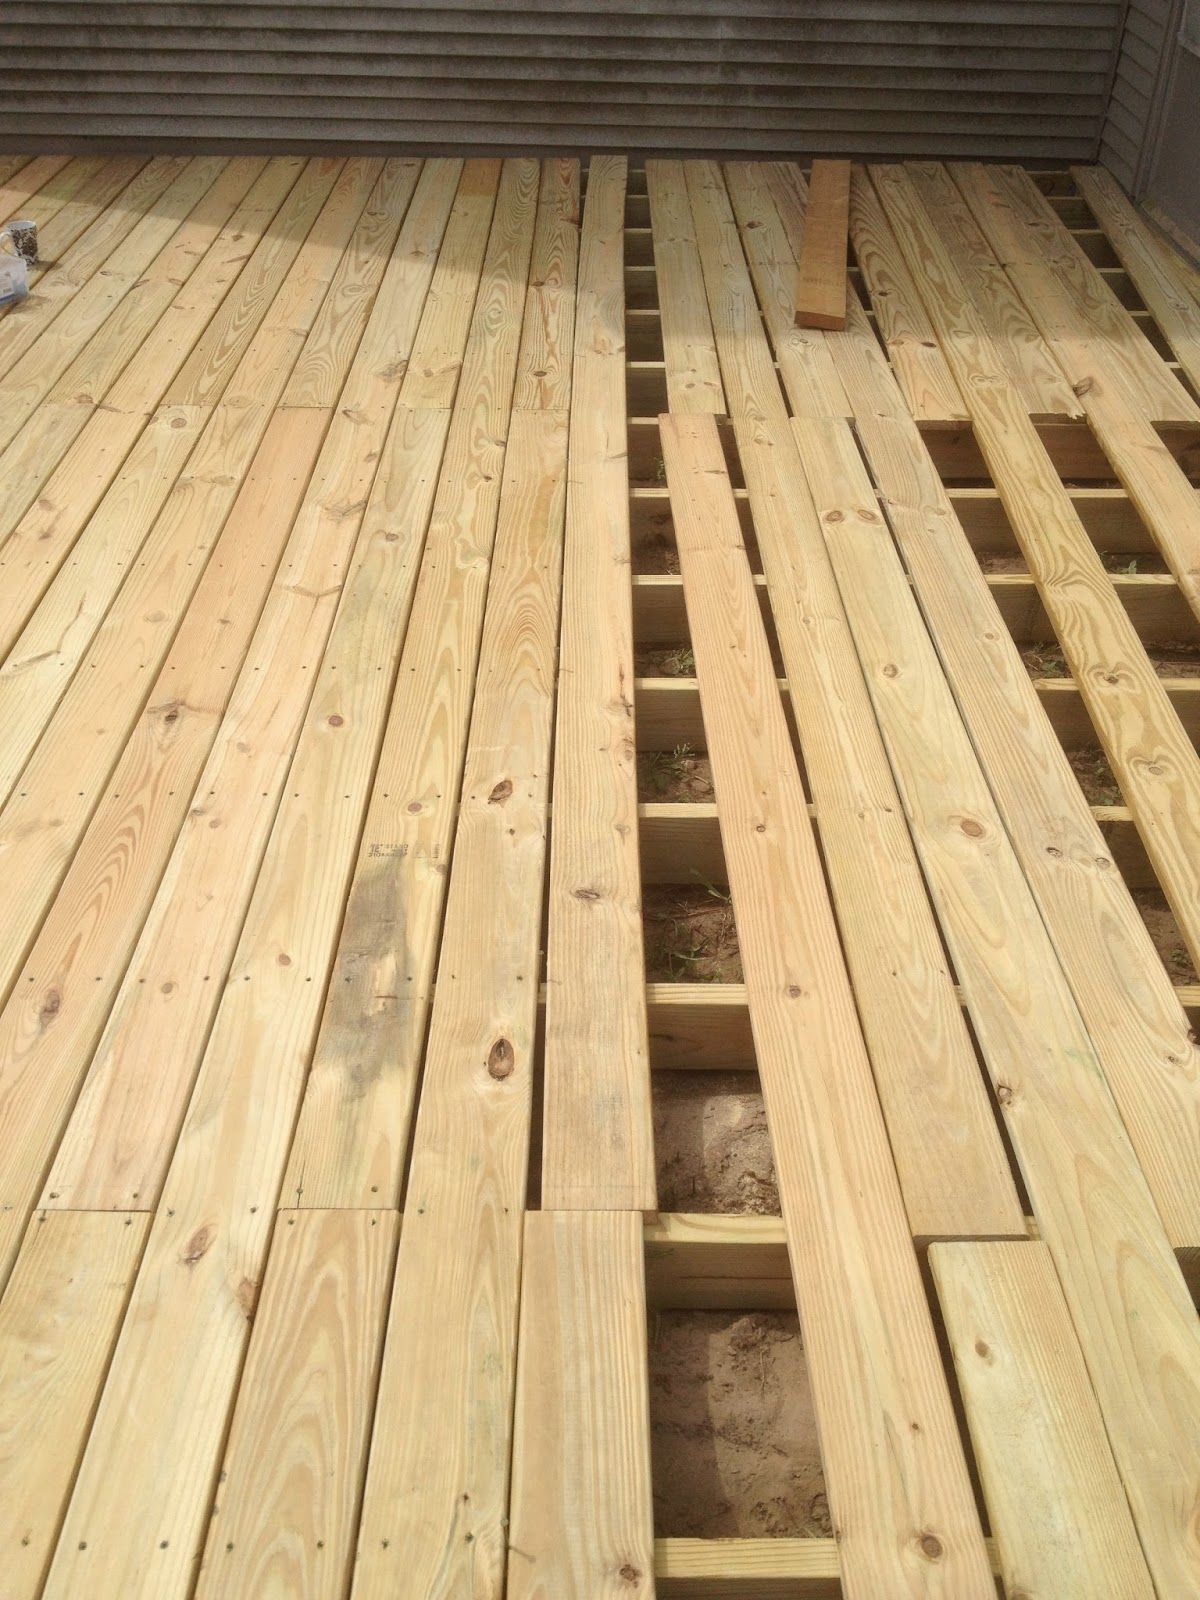
  • Step 4: Install Floor Joists – Measure out how big your floor needs to be and install joists along each side, creating a frame for your future floor planks
  • The joists should be spaced no more than 16 inches apart for optimal stability and strength when walking across them later on
  • Step 5: Secure Plywood Subfloor– Place plywood sheets overtop of each joist section until they are completely covered by wood planks at least ½ inch thick or thicker depending on what type of finished look you’re going for
  • Nail into place using galvanized nails specifically made for outdoor applications
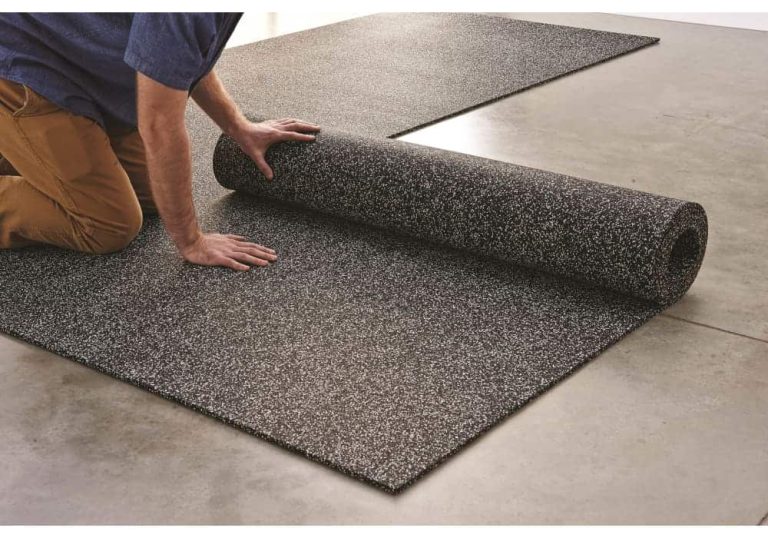
  • Step 6: Seal Edges- After everything is nailed into place, seal off each edge with caulk or silicone sealant prior to installing any other materials like tile or hardwood floors
  • This will keep moisture from seeping in between boards which can cause mold growth if not properly sealed off first

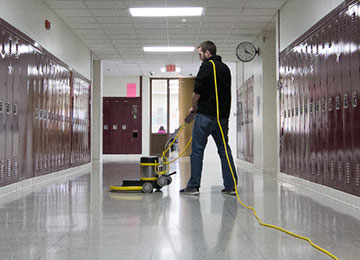
Flooring Over Dirt Basement

When you think of a basement, the first thing that comes to mind is probably dirt floors and cold cement walls. While these basements have their charm, they’re not always the most inviting or comfortable space. Fortunately, there are ways to make them more livable by installing flooring over dirt basement floors.

The primary benefit of doing this is that it can provide insulation from cold temperatures in your basement as well as help reduce dampness and moisture levels. Additionally, flooring over dirt basements can add visual appeal to an otherwise dreary area, making it a more pleasant place for family members or guests who may come down into the lower level of your home. When choosing which type of flooring to install on top of a dirt basement floor, there are several options available.

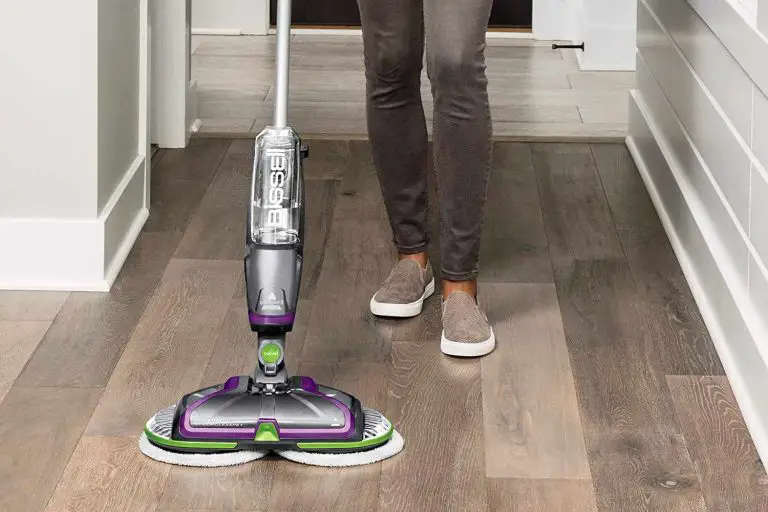
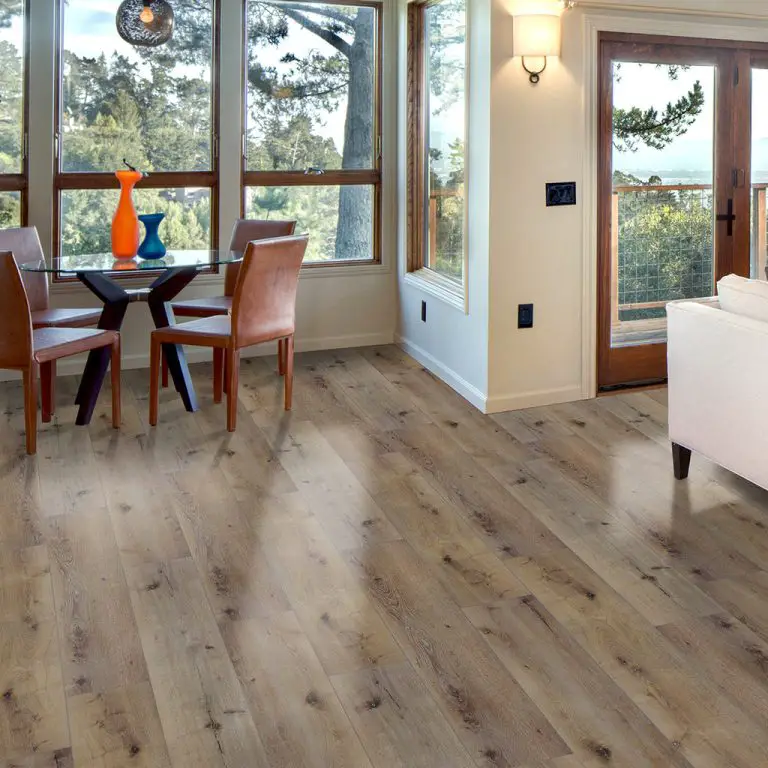
Carpet tiles are one popular choice since they’re easy to install and don’t require much maintenance once laid down correctly. Vinyl plank flooring is also another great option due to its durability and waterproof qualities while still providing an attractive aesthetic look with various color options available depending on your style preference. Hardwood floors are also an option but should only be used if you have adequate ventilation in order to avoid any warping issues caused by moisture buildup in the air below ground level.

. If you decide to go with carpet tiles or vinyl planks for your new basement project then make sure that you use adhesive specifically designed for installation on concrete surfaces such as self-leveler compound (for carpets) or high grip adhesive (for vinyl planks). You will also need some sort of sealant like latex paint/sealer for added protection against water damage before laying down either type of material so ensure that whatever product you choose has been approved as safe for installation purposes by local building codes in your area.

If hardwood floors are what you prefer then start off by having the professionals at Home Depot inspect your subfloor surface prior to installation because if too much moisture has built up underneath then no amount of sealant will prevent potential warping issues later on down the line when wood absorbs excess wetness form nearby soil particles present beneath concrete slabs inside foundations.

What Flooring Can You Put Over Dirt?

If you’re looking for a way to cover up dirt in your home, there are several flooring options that can be placed over dirt. Depending on the type of look and feel you want, each option will offer different benefits as well as drawbacks. One popular choice is synthetic turf or artificial grass.

This is great if you want an outdoor feeling inside and it’s also very low-maintenance since it doesn’t require watering or mowing like real grass does. It also creates a soft surface to walk on, so it’s great for kids’ rooms or playrooms. The downside is that the cost may be higher than other options since installation requires special tools and techniques to avoid damage from settling soil underneath the turf.

Another flooring solution that can go over dirt is laminate tiles or planks. These come in various colors and styles which makes them perfect if you’re looking for something more decorative than plain old dirt. They are easy to install but need regular maintenance such as sweeping regularly because they can absorb moisture which could cause warping or buckling of the material over time.

While this option may seem appealing due to its initial affordability, keep in mind that it won’t last nearly as long as some other types of flooring materials when exposed to heavy foot traffic areas like living room floors where furniture sits on top of them all day long. Vinyl plank flooring (also known as luxury vinyl tile) is another great option when covering up dirt indoors because they provide a stunning wood-like appearance with minimal upkeep required – just occasional cleaning using warm water mixed with a mild soap should do the trick!

Vinyl planks are relatively inexpensive compared to hardwood floors but still provide good durability against wear and tear while being waterproof too which means no worries about spills ruining your beautiful new floors either! Additionally, these planks come pre-glued making installation much simpler than laying traditional wood boards down one at a time without any adhesive needed at all – though they do take longer drying times once installed before use can begin again afterward so bear that in mind if installing yourself instead of hiring professionals who already have experience doing such jobs quickly & efficiently! Plus their ability not only to withstand moisture exposure but resist staining makes them ideal for bathrooms or kitchens where spills might occur more often than elsewhere around the house too 😉

Can You Pour Concrete Over Dirt Basement Floor?

When it comes to pouring concrete over dirt basement floors, the answer is yes – provided that you take certain steps and precautions. Doing so can provide a sturdy and reliable foundation for your basement flooring, but there are some important considerations to keep in mind before starting this project. Before pouring concrete on the dirt floor of your basement, the first step should be to make sure that any moisture from below has been removed.

This means that all water sources such as plumbing leaks must be addressed prior to beginning work on the floor. It’s also critical that standing water and high humidity levels have been addressed with proper drainage systems or dehumidifiers if necessary. The last thing you want is for moisture to seep up through your concrete foundation and cause mold or mildew growth in your home.

Once you’ve ensured that the area is dry and free of any potential sources of moisture, it’s time to prepare the surface by removing any debris or large stones from the soil beneath. You may need a shovel or other tools depending on what kind of material needs removal from underneath your intended pour site. Once cleared out, use a tamper tool (a mechanical device used for pressing down soil) to flatten out any bumps or soft spots in order to create an even surface upon which you can apply concrete effectively.

Now it’s time for laying down gravel! Gravel helps ensure good drainage when poured directly onto dirt surfaces; its small rocks help fill gaps between larger particles found in the soil while providing stability against shifting during settling processes due to weather changes like heavy rains or snow melt-off seasons etcetera.

Spread 3-4 inches thick across the entire area where concrete will go then compact them together using a tamper once more until level again so no air pockets remain within layers being built up afterward – this provides a strong base layer to keep everything intact after the drying process completes itself eventually leading into final product expected results desired by homeowner/contractor alike!. Finally, you can begin mixing and pouring your concrete mix onto the prepared surface following manufacturer guidelines regarding the amount needed based upon the square footage being covered – typically around 4 inches deep minimum recommended depth-wise at least however sometimes deeper depending on the particular situation encountered here too (i.,e., weight-bearing structures).

Can You Put Rubber Flooring Over Dirt?

When considering flooring options for space, rubber flooring is often an attractive option due to its durability and ease of maintenance. But can you put rubber flooring over dirt? The answer is yes, but there are some important considerations to keep in mind.

The first step when installing rubber flooring over dirt is to level the surface by removing any large rocks or debris that may be present. This will help ensure a smooth and even application surface for the rubber material. Once the area has been cleaned up, it’s important to compact the soil before laying down any type of subfloor such as plywood or concrete board.

Compacting provides added stability which helps prevent shifting and movement once installed. Once you have prepped your surface, it’s time to install the rubber flooring product of your choice. One benefit of using this type of material over dirt is that no adhesive is required since it can simply be laid on top with ease – however, make sure that if you opt for tiles instead of rolls they fit together tightly so no gaps remain between them where moisture could accumulate underneath them leading to mold growth or other issues long term.

. Additionally, trimming around pipes or objects protruding from the ground will be necessary when cutting pieces off-site prior to installation; otherwise, these items can create bumps underfoot once complete! Finally, while not always necessary depending upon how much foot traffic your space receives daily – adding a sealant layer on top after installation can help dramatically improve its lifespan as well as reduce staining and fading caused by UV exposure outdoors.

. Additionally, a regular cleaning with warm water mixed with mild detergent will prolong its life even further! In conclusion – yes you can put rubber flooring over dirt but taking steps beforehand such as compaction and applying sealants afterward (if desired) are wise investments that should result in many years of enjoying your new healthy living environment without worry about sinking floors or persistent odors emanating from below!

What Can I Do About a Basement Dirt Floor?

Basements are often the least desirable part of homes, as they can be damp, dark, and difficult to access. A common issue found in basement floors is that they are dirt. This can lead to a number of problems, such as insects infesting the area or moisture seeping into your home and causing mold growth.

Fortunately, there are several steps you can take to address this problem. The first step is to assess the current state of your basement floor. Is it level?

Are there any cracks or crevices present? If so, these need to be filled with concrete before proceeding further. Additionally, if you have drainage issues in your basement (such as water pooling), these need to be addressed before continuing with any other steps toward improving the floor’s condition.

Once those tasks have been completed, you will want to cover up the existing dirt floor with some type of material that will help protect against moisture and pests while providing better insulation for your space overall. Some popular options include plywood sheets covered by vinyl tiles or carpeting; poured concrete; or interlocking plastic tiles designed specifically for basements. All three materials should be sealed properly in order for them to achieve maximum performance levels when it comes to preventing moisture from entering through cracks and small openings in between boards/tiles/etcetera.

Finally, if necessary make sure that proper ventilation has been installed throughout your basement so air circulates freely throughout the space — this will help keep humidity levels low which may reduce instances of mold growth over time! You also might consider installing a dehumidifier if needed due to an excess amount of moisture coming from outside sources like nearby rivers or ponds etcetera.

Overall these steps should help transform an otherwise unusable space into one where family members can safely spend time without fear of health risks posed by a dirty unfinished dirt floor!

How Do I Build an Earthen Floor?

If you’re looking to build an earth floor in your home, you may be wondering where to start. An earthen floor is a natural and eco-friendly option that can provide insulation and beauty in any space. Building an earthen floor isn’t as difficult as it might sound, but there are several steps involved that must be completed carefully for the best results.

Here’s what you need to know about building your own earthen floor. Step

1: Prepare the Subfloor Before beginning construction of the actual earthen floor, you’ll need to prepare a suitable subfloor for installation. A concrete slab or directly on top of the soil will both work fine; however, if installing over soil make sure that it’s level and free from debris such as rocks or sticks before proceeding with construction. If laying down a concrete slab then make sure it’s properly cured before continuing. Step

2: Install Insulation Board To ensure proper insulation and stability underfoot, install rigid foam insulation boards between the subfloor (concrete slab/soil) and the earthen layer(s). The type of board used depends on how thickly insulated you’d like your finished product to be – using multiple layers may give better results than just one thicker layer depending on individual needs/tastes – but polyisocyanurate is generally considered ideal for this purpose due to its lightweight yet excellent insulating properties when compared with other options available. Additionally, this material also has good fire resistance which should always be taken into consideration when selecting materials for use within a structure’s walls or floors!

3: Mixing Clay Soil Once prepped, begin mixing clay soil with water until it forms a paste-like consistency; some sources suggest adding straw or sand at this stage too but this ultimately comes down to personal preference (and availability). Before applying onto the prepared surface, allow mixture time to sit so particles settle out – approximately 30 minutes should suffice here though again experimentation can yield different results depending upon specific circumstances at hand!

4: Applying Earthen Layer & Finishing Touches Next apply clay mix onto the prepared surface using either hand (rough gloved up!) trowel/plaster spreader evenly distributing throughout the area desired.

What Type of Flooring is Best for a Shed?

When it comes to choosing the right type of flooring for your shed, there are many factors to consider. The most important factor is finding a material that can withstand moisture and temperature extremes, as well as wear and tear over time. Depending on how you plan to use your shed, different types of flooring may be more suitable than others.

One popular option for sheds is concrete or cement-based flooring. Concrete provides an extremely durable surface that can stand up to heavy traffic and harsh weather conditions such as rain or snowfall. It’s also quite easy to clean if any spills occur inside the shed.

However, concrete floors can be cold in winter months without insulation underneath them, so if this is a concern you should look into installing radiant heating systems beneath the concrete slab before installation begins. Another great option for sheds is wood floorings such as plywood or tongue & groove boards which provide excellent resistance against water damage but will require some ongoing maintenance such as sealing off cracks between each board when necessary with sealant products designed specifically for wood floors in order to protect against further damage from humidity or liquid spills seeping through the cracks over time. Wood floors are usually much easier on the feet than concrete surfaces due to their natural cushiony texture and they have a warm aesthetic look making them ideal choices for storage rooms too!

If you’re looking for something that requires less maintenance than either of these options mentioned above then vinyl plank flooring might just be what you need! Vinyl plank offers superior protection against water damage thanks to its impermeable nature and its scratch-resistant finish makes it perfect for active households where sharp objects like tools may come into contact with the surface often during work projects inside the shed area itself – plus it looks great too! Ultimately choosing the best type of flooring depends entirely on how you intend to use your shed space now and in future years – whether it’s used mainly as a storage area only or actively employed workspace involving power tools etc., there are several viable options available depending on budget constraints along with durability/maintenance requirements needed over time – so make sure you research all possibilities thoroughly before settling upon one particular choice!

From Dirt Floors to New Floorboards – 130-year-old Building Renovation

Conclusion

Building a floor over dirt doesn’t have to be difficult. In fact, it’s not as hard as you might think. With a few simple steps, you can easily build a sturdy and durable floor that will last for years to come!

First things first, make sure the ground is level and well-drained. If necessary, fill in any low spots with gravel or sand before continuing. Once this is complete then lay down the foundation of your floor using either concrete blocks or treated wood boards depending on preference. Make sure to set these firmly into the ground so they are secure. Next up comes framing – use 2x4s (or larger if desired) to create the frame of your floor which should include both side rails and cross members at regular intervals throughout its length and width for added strength and stability. Securely attach them together with screws or nails at each intersection point of their contact points so they don’t move around while building outwards from thereon outwards towards completion; add additional support beams where necessary when required by weight load considerations such as near kitchen appliances etc.

Once completed you’ll need plywood sheets cut precisely to size for laying across the top of the frame – glue them down securely with construction adhesive before adding screws through pre-drilled holes along perimeter edges every 8 inches apart plus more in areas prone to heavier loads like refrigerators & stoves, etc. Now all that remains is covering the entire surface area with a waterproofing material such as rubberized paint/coating system applied according to manufacturer instructions followed by an appropriate finish coat sealer layer over top off same ie: epoxy-based clear coating agent suitable outdoor conditions etcetera. Finally, inspect everything one final time making sure all components were properly installed/secured prior to commencing usage thereof; Congratulations you just built yourself a brand new Floor Over Dirt!

Similar Posts

Leave a Reply

Your email address will not be published. Required fields are marked *