How to Install Floor Pans Without Welding
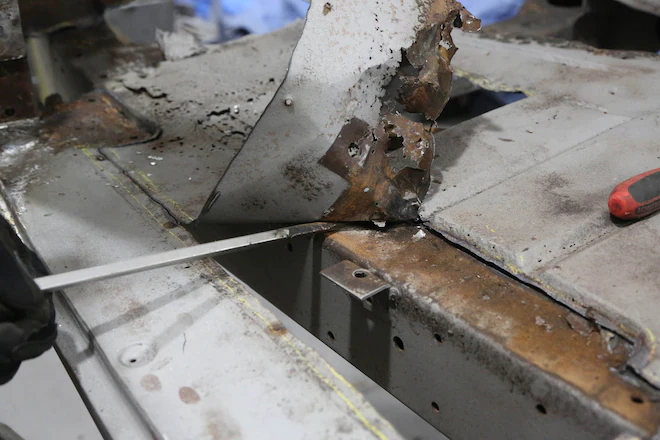
If you’re looking to install new floor pans without welding, there are a few things you’ll need to do. First, remove the old floor pans. You’ll need to use a chisel and hammer to loosen the old floor pan so it can be removed.
Next, clean up the area where the new floor pans will be installed. Be sure to remove any rust or debris so the new floor pans will have a smooth surface to adhere to. Finally, apply a generous amount of adhesive or sealant to the new floor pans before installing them in place.
Once they’re in position, press them firmly into place and allow them to dry overnight before driving your vehicle again.
- Remove the old floor pans
- This will require a Sawzall or some other type of cutting tool to remove the spot welds holding the old pans in place
- Clean up the area where the new floor pans will be installed
- This includes removing any rust, scale, or debris from the metal surface
- Position the new floor pan in place and mark where it needs to be cut to fit properly
- Cut the new floor pan to size using a Sawzall or similar cutting tool
- Install the new floor pan in place using self-tapping screws or rivets to secure it in place
How Hard Is It to Replace Floor Pans?
If you’re considering replacing the floor pans in your vehicle, you might be wondering how difficult the process is. The truth is, it depends on the vehicle and the extent of the damage. In some cases, it may be a relatively simple process that can be completed in a few hours.
In other cases, it may be a more complicated project that could take days or even weeks to complete. When replacing floor pans, there are a few things to keep in mind. First, you’ll need to remove all of the old floor pan material.
This can be done with a chisel and hammer or with a power tool like an angle grinder. Next, you’ll need to clean up any rust that has formed on the underside of the vehicle. Once the rust is gone, you can start installing the new floor pans.
The process of installing new floor pans will vary depending on the vehicle and the type of pan you’re using. In most cases, however, it’s simply a matter of bolting or welding them into place. If you’re not comfortable doing this yourself, there are plenty of shops that specialize in automotive repairs and they should be able to do it for you relatively cheaply.
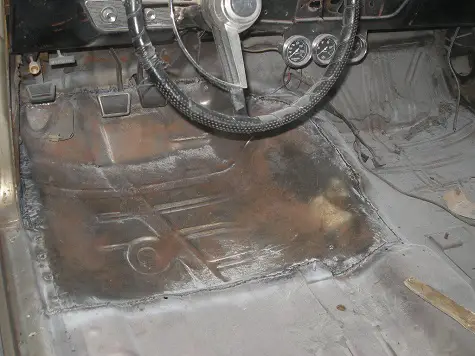
Credit: www.restore-an-old-car.com
What are Floor Pans Attached To?
A floor pan is the bottom part of a vehicle’s body that sits between the frame rails and forms the floor of the passenger compartment. The floor pan can be made of steel, aluminum, or other materials. It is attached to the body with spot welds, rivets, or bolts.
What Gauge Steel are Floor Pans?
When it comes to floor pans, the gauge of steel can vary depending on the make and model of your vehicle. However, most floor pans are made from either 14 or 16-gauge steel. The thicker the gauge, the stronger and more durable the pan will be.
If you’re looking for a new set of floor pans for your car, truck, or SUV, be sure to check with your manufacturer to see what they recommend.
How Long Does It Take to Install a Floor Pan?
Assuming you are talking about a car, it would take approximately 4 hours to install a floor pan. This is assuming that you have all the necessary tools and parts. If you need to weld anything, it could take longer.
New Floor Pans save the $500 Ranger. Weld Free Rust repair.
Patching Holes in Floor Pan
If your vehicle has a hole in the floor pan, it’s important to patch it as soon as possible. Not only is this a safety hazard, but it can also lead to further damage to your vehicle. Fortunately, patching a hole in a floor pan is relatively easy to do and doesn’t require any special tools or materials.
The first step is to clean the area around the hole. This will help the patch adhere better and will also prevent any dirt or debris from getting into the hole. Once the area is clean, you can then measure and cut a piece of sheet metal that will be used to patch the hole.
It’s important to make sure that the piece of sheet metal is slightly larger than the hole so that there is room for overlapping edges. Once you have your piece of sheet metal cut out, use some strong adhesive to attach it over the hole in the floor pan. You may need to hold it in place for a few minutes until the adhesive dries.
Then, use some automotive body filler to smooth out any uneven edges and give the patch a nice finished look. Once everything is dry, sand down the area so that it blends in with the rest of the floor pan, and paint over it if necessary. That’s all there is to it!
Patching a hole in your floor pan isn’t difficult and only requires a few simple supplies that you likely already have on hand. By taking care of this repair quickly, you can avoid any further damage or safety hazards down the road.
Conclusion
If you’re restoring an old car, one of the most important parts of the process is installing new floor pans. While it’s possible to weld in new pans, that’s not always necessary. There are a few ways to install floor pans without welding, and this blog post will walk you through each method.
The first method is using bolts and nuts. This is a fairly simple process, but it does require some drilling. You’ll need to drill holes in both the floor pan and the body of the car so that you can bolt the two together.
It’s important to make sure that the holes are lined up correctly before you start drilling, or else you could end up with a very crooked installation. Another way to install floor pans without welding is by using adhesive. This method is a bit more involved, but it can be just as strong as welding if done correctly.
First, you’ll need to clean both surfaces thoroughly so that the adhesive will stick properly. Next, apply a generous amount of adhesive to both surfaces and press them together firmly. Once the adhesive has had time to dry, you can finish bolting or screwing everything into place.