How do you install a 3 hole kitchen faucet?
Installing a 3 whole kitchen faucet is a relatively simple job that most DIYers can do with the right tools and a little bit of time. Before starting, make sure you have all the necessary tools and parts. This includes a wrench, plumber’s tape, mounting hardware, and the faucet itself. First, turn off the water supply and disconnect the water lines from the old faucet. Then, remove the old faucet from the sink. Next, install the mounting hardware on the sink and attach the new faucet to the sink. Then, connect the water lines to the new faucet and turn the water supply back on. Finally, adjust the water pressure and check for leaks. With these steps, you should have a new 3-hole kitchen faucet installed in no time.
Tools Needed for Installation
Installing new software can be a daunting task, but don’t worry – with the right tools, it’s easy! The first step in any successful installation is ensuring that you have the necessary tools to complete the process. Depending on the type of software you are installing, the tools you need may vary. Generally, you should gather the necessary installation media, such as a disc or a USB drive, as well as other files required for the installation. Additionally, you should have a reliable computer, a secure internet connection, and the latest version of any required software. With the right tools in hand, you’re ready to begin the installation process!
Preparation Steps
Preparation is key to any successful blog. Taking the time to research, plan and create a strategy before starting a blog will ensure that your content is engaging and your readers are satisfied. To get the most out of your blog, there are several steps you should take before launching. First, decide on a topic or theme for your blog and research it thoroughly. Next, create a content plan and develop a writing style that is consistent and engaging. Finally, create a plan for marketing your blog and decide how you will promote it. Taking the time to prepare your blog will result in a successful and rewarding experience.
Attaching Water Supply Lines
Water supply lines are essential for ensuring that a plumbing system works properly. Attaching these water supply lines is a key step in the installation process. This involves running the lines from a water source to the necessary fixtures and appliances and then connecting them to the right fittings. It is important to ensure that the lines are properly sealed to prevent water leakage and that the connections are properly secured. With careful attention to detail, water supply lines can be successfully attached, providing a reliable source of water to your home.
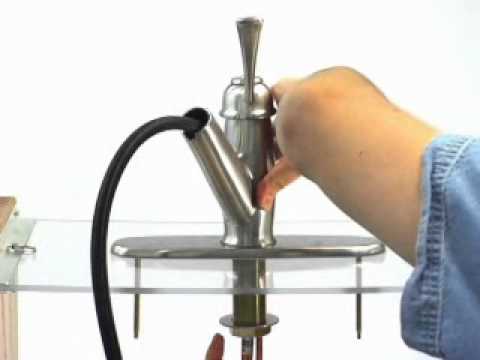
Securing the Faucet into Place
Securing a faucet into place is a vital step in the installation process of any sink or basin. With the right tools and the right know-how, it can be a quick and easy job. It is important to ensure that the faucet is securely attached to both the sink and the water supply line. Make sure to use the right hardware and follow the installation instructions carefully to ensure a secure and lasting fit. With a few simple steps, you can have your faucet securely in place and ready to use in no time!
Connecting Drains
Connecting drains in your home is essential for keeping your plumbing system functioning properly. Not only does it prevent water from backing up and flooding your home, but it also keeps harmful bacteria and contaminants from entering your drinking water. With a few simple steps, you can easily and safely connect your drains and keep your home safe from water damage and harmful bacteria.
Installing the Sprayer
Installing a sprayer may seem like a daunting task, but with a few simple steps, you can have it up and running in no time. First, make sure that you have all the necessary components, such as the sprayer, any necessary parts, and a hose or pipe for connecting the sprayer to your water source. Once everything is in place, you can begin the installation process. Start by connecting the sprayer to your water source using the pipe or hose, then secure the connection with a wrench or other tool. Next, attach the nozzle to the sprayer, ensuring a tight fit. Finally, test the sprayer to ensure that it is working properly. With the correct tools and a little bit of know-how, you can easily install a sprayer in no time!
Testing for Leaks
Testing for leaks is an essential part of maintaining the safety and efficiency of any plumbing system. Leaks can be caused by faulty seals, corrosion, or even broken pipes, and can lead to costly water damage if not addressed. To detect leaks, technicians use specialized equipment such as thermal imaging cameras and ultrasonic leak detectors, to scan for and pinpoint the exact location of the leak. Additionally, pressure testing the system is also necessary to ensure that the pipes are in good condition and not leaking elsewhere. Regular testing for leaks will not only prevent unnecessary damage but will also help save money and resources in the long run.
Final Touches
The finishing touches to any project are the most important. Whether it’s a blog post or a major renovation, taking the time to make sure everything is perfect is vital. “8. Final Touches” is all about making sure you’ve done everything you can to make your project the best it can be. This might include such tasks as proofreading, checking for errors, ensuring the formatting is correct, and even making sure the visuals are up to standard. By taking the time to give your project some final touches, you can be sure that it will shine and stand out from the rest.
FAQs About the How do you install a 3-hole kitchen faucet?
What tools are required to install a 3-hole kitchen faucet?
The tools required to install a 3-hole kitchen faucet include a basin wrench, a Phillips head screwdriver, adjustable pliers, a putty knife, and a drill.
Is it difficult to install a 3-hole kitchen faucet?
The level of difficulty of installing a 3-hole kitchen faucet will depend on the user’s level of experience with plumbing. However, with the proper preparation and following the installation instructions, it is possible to install a 3-hole kitchen faucet without any major issues.
How long does it take to install a 3-hole kitchen faucet?
A3: The time it takes to install a 3-hole kitchen faucet will vary depending on the user’s level of experience with plumbing and the amount of time spent preparing for the installation. Generally, a 3-hole kitchen faucet installation can be completed in 1-2 hours.
Conclusion
Installing a 3-hole kitchen faucet is a relatively easy and straightforward process. It is important to first identify the number of holes in the sink and select a faucet that will fit the space. After gathering the necessary supplies, the process involves connecting the water supply lines and mounting the faucet. With the right tools and supplies, installing a 3 hole kitchen faucet can be done in just a few steps.