How Do You Install A Pop Up Rod On A Sink?
Installing a pop-up rod on a sink is a great way to add convenience and functionality to your kitchen or bathroom sink. This simple installation process can be completed in a few steps and does not require any specialized tools. This guide will walk you through the process of installing a pop-up rod on a sink, from gathering the necessary materials to making the final adjustments. With the right preparation and following the steps provided, you will be able to install your new pop-up rod in no time.
Overview of a Pop-Up Rod
Pop-up rods are an essential component in many bathroom and kitchen sinks. Installing a pop-up rod is a straightforward process, but it’s important to understand the different parts and how they work together. This guide will walk you through the basics of pop-up rods, so you can ensure your installation goes smoothly and lasts for years.
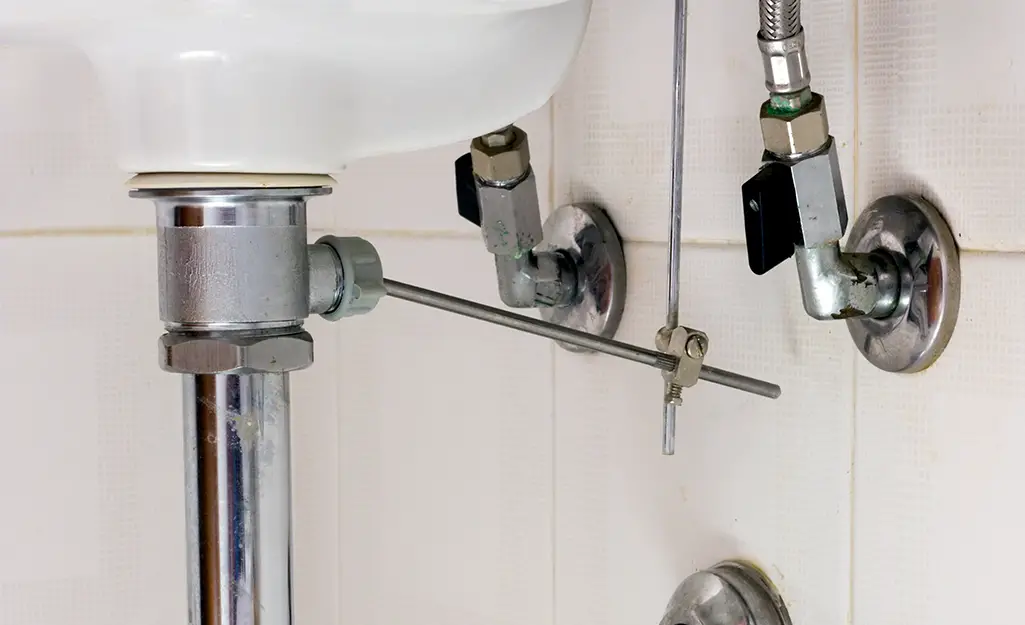
Pop-up rods are typically made of metal and consist of two main parts: the rod itself and the drain lever. The rod is connected to the lever, which is then connected to the drain. When the lever is moved, the rod will open and close the drain, allowing water to drain from the sink. It’s important to note that pop-up rods can come in different lengths and sizes, and the type of rod you choose will depend on the size and depth of your sink.
In addition, the type of drain you have will determine the type of rod you need. For example, a standard drainage hole may require a different type of rod than a deep basin. Knowing the type of drain you have will help you select the right rod for your installation.
Once you have the right rod, the installation process is relatively simple. First, attach the rod to the drain lever, making sure it fits securely. Then, attach the lever to the drain, making sure the rod is lined up correctly. Finally, close the drain lever and test the rod to make sure it is working properly.
Installing a pop-up rod may seem intimidating, but with the right tools and a little patience, you can ensure your installation goes smoothly. With the right rod and a few simple steps, you can have your sink up and running in no time.
Tools and Materials Needed
Installing a pop-up rod on a sink is a task that requires some basic tools and materials. To get started, you’ll need a pop-up rod, a pair of adjustable pliers, a screwdriver, a silicone sealant, and a wrench. You may also need some extra pipe fittings, depending on your sink design. It’s important to ensure that you have all the necessary tools and materials before beginning the installation.
Once you have the tools and materials ready, take the pop-up rod and thread it through the hole in the sink, connecting one end to the sink drain and the other to the sink basin. Secure the rod with a screwdriver and secure the pipe fittings with the wrench. Finally, use the silicone sealant to seal the connection between the sink drain and the pop-up rod. After this step is complete, your pop-up rod installation is complete and ready to be used.
Preparing the Sink for Installation
Installing a pop-up rod on a sink is a fairly straightforward process, yet there are a few steps you must take prior to beginning the installation. To begin, you should first make sure that the sink is clear of debris and dirt. Use a sponge and gentle cleaner to scrub the sink and remove any dirt or grime. Next, you will need to measure the distance from the sink drain to the faucet to ensure that the pop-up rod will fit. Then, use a wrench to loosen the nut holding the drain in place and disconnect the drain pipe. After the drain pipe is removed, the sink should be ready for the new pop-up rod.
Installing the Pop Up Rod
on a Sink
Installing a pop-up rod on a sink is a relatively easy process, but it does require a few tools and materials. The first step is to measure the distance between the sinkhole and the water outlet. Then, cut a piece of PVC pipe to the appropriate size to fit the distance. Next, remove the nut from the pop-up rod and attach the PVC pipe to it. Secure the pipe to the sink with plumber tape and sealant. Finally, attach the drain pipe to the sink tailpiece and the pop-up rod to the drain pipe. Make sure all parts are properly tightened and the sealant is dry before testing the drain. Following these steps will ensure that the pop-up rod is properly installed and functioning properly.

Testing and Troubleshooting
Installing a pop-up rod on a sink can be a straightforward process, but it is important to test and troubleshoot the installation to ensure it is functioning correctly. After the pop-up rod is connected to the sink drain, fill the sink with a few inches of water and then activate the rod. If the rod works properly, the water should drain out of the sink and the stopper should remain in the closed position. If the rod does not activate correctly or the stopper does not close completely, the issue may be caused by a faulty connection or a misaligned stopper. To address these issues, remove the pop-up rod and inspect the connections to ensure they are secure and properly connected. If the connections are secure, realign the stopper and test the rod again. If the rod still fails to function, it may be necessary to replace the pop-up rod with a new one.
Cleaning and Maintenance
Cleaning and maintenance is an essential part of any bathroom renovation. Installing a pop-up rod on a sink is an easy way to prevent water buildup and keep your bathroom looking neat and tidy. But before you begin, it’s important to understand the step-by-step process of installing a pop-up rod. This guide will walk you through the process, from preparation to installation, and provide tips on how to make sure your installation is done correctly.
First, you’ll need to gather the necessary tools and materials. Make sure to have a pop-up rod, a wrench or pliers, a screwdriver, sealant, and any other materials necessary for installation. Once you have everything you need, begin by measuring the hole in your sink and cutting the rod to size. Then, use the wrench or pliers to secure the rod to the sink, and use the screwdriver to tighten the screws.
Next, apply sealant around the edges of the rod and let it dry. After that, attach the lift rod to the pop-up and use the screwdriver to secure it. Finally, test the rod to make sure it’s working properly. If all looks good, you can enjoy your newly installed pop-up rod and enjoy a cleaner, more organized bathroom.
Installing a pop-up rod on a sink is an easy way to keep your bathroom looking neat and tidy. With the right tools and materials, you can quickly and easily complete the installation process. Following these simple steps will ensure that your pop-up rod is installed correctly and performs its intended function.
Alternatives to Installing a Pop-Up Rod
Installing a pop-up rod on a sink is a great way to maintain a clean, tidy, and organized kitchen. However, it’s not the only option available. Other alternatives to installing a pop-up rod include installing a sink strainer, utilizing a waste disposal unit, and opting for a sink disposal flange. Each of these options provides a different level of convenience and ease of maintenance, so it’s important to consider which one is best for you and your kitchen needs.
Sink strainers are a great alternative to installing a pop-up rod. They have an integrated filter that prevents unwanted debris from entering your sink. This is a great option for those who don’t want to install a pop-up rod but still want to keep their sink clean.
Another option is to install a waste disposal unit. This unit grinds up food waste and sends it down the drain, preventing the need for a pop-up rod. However, it’s important to note that a waste disposal unit requires a considerable amount of maintenance and can be quite noisy in operation.
Finally, a sink disposal flange might be the best option for you. This flange attaches to the sink and makes it easier to keep the sink clean and clear of debris. It also helps to reduce the amount of time and effort needed to clean the sink.
No matter which option you choose, it’s important to consider how it will fit into your kitchen’s overall design and functionality. Each option has its pros and cons, so it’s important to weigh them all before making a decision.
FAQs About the How Do You Install A Pop-Up Rod On A Sink?
1. What tools are needed to install a pop-up rod on a sink?
A. To install a pop-up rod on a sink, you will need a Phillips head screwdriver, an adjustable wrench, and a basin wrench.
2. Do I need to turn off the water supply before I install a pop-up rod?
A. Yes, it is important to turn off the water supply before installing a pop-up rod in order to avoid any accidental flooding.
3. What type of plumbing assembly is required to install a pop-up rod?
A. Depending on the type of sink you have, you may need to use additional plumbing pieces such as a tailpiece, drain gasket, and a washer, in order to properly install the pop-up rod.
Conclusion
A pop-up rod on a sink is a relatively easy and quick process. All you need to do is first remove the old rod, if applicable, and then insert and secure the new rod in the sink. Make sure to use a sealant or Teflon tape to keep any water from leaking out. Once you have the rod in place, you can attach the lift rod and pop-up rod to the new rod. Finally, you can use the set screw to tighten the rod and then test the lift and pop-up to make sure they are working properly. With the proper tools and a few simple steps, you can easily install a pop-up rod on your sink.