How To Install Rigid Foam Insulation On Interior Walls
Installing rigid foam insulation on interior walls is an effective way to increase the energy efficiency of your home. Rigid foam insulation is a type of insulation that is made from polystyrene or polyisocyanurate and is ideal for insulating walls, ceilings, and floors. Installing rigid foam insulation is a relatively simple process that can be completed in a few hours. This article will provide a step-by-step guide to successfully installing rigid foam insulation on interior walls. By following these instructions, you can ensure that your insulation will be properly installed and will provide your home with the best energy efficiency possible.
Preparation
Installing rigid foam insulation on interior walls is a great way to maintain a comfortable temperature in your home and conserve energy. Before beginning the installation process, however, it is important to take the necessary steps to ensure the walls are correctly prepped. Proper preparation is the key to a successful insulation installation.
First, it is important to remove any existing insulation and debris from the wall. This can be done with a vacuum cleaner, broom, and dustpan, or by using a pry bar and hammer to remove any loose plaster. It is also important to fill in any holes, cracks, or gaps in the wall. This can be done with a wall patching compound and a putty knife.
Next, the wall should be given a good cleaning. This will help ensure the insulation adheres properly and that no dirt or debris gets trapped behind the insulation. A mild detergent and water can be used for this step.
Measuring and Cutting
Installing rigid foam insulation on interior walls is a great way to improve the energy efficiency of your home and reduce your energy bills. But before you start the installation process, you must measure and cut the rigid foam boards to the correct sizes. This is an important step, as the insulation will not be able to do its job properly if the boards don’t fit properly.
Measuring your interior walls is the first step in the process. You will need to measure the width and height of the wall you are installing the insulation, as well as the thickness of the boards. Once you have the measurements, you can then use a measuring tape and a straight edge to mark the insulation boards to the correct size.
Once the boards are marked, you can then use a sharp knife or a power saw to cut the boards to size. It is important to make clean cuts, as any rough edges or jagged lines could cause the boards to not fit properly. Be sure to wear safety gear, such as gloves, goggles, and a dust mask, when cutting the insulation boards.
Cutting Rigid Foam Insulation
Cutting rigid foam insulation for installation on interior walls can seem like a daunting task. After all, you want to make sure that you get a precise and accurate fit. The good news is that, with the right tools and a bit of knowledge, cutting rigid foam insulation is quite simple.
The first step is to measure the walls that you plan to insulate, taking into account any electrical outlets, pipes, and other features. Once you have your measurements, you can then use a utility knife or saw to cut the insulation boards to the right size. When using a saw, it’s important to remember to use a fine-tooth blade, as this will help to ensure that the edges are clean and precise.
For more intricate shapes, you may need to use a jigsaw or router. If you’re using a router, be sure to wear protective equipment, such as safety goggles, and use the appropriate bit for the job.
Installing Rigid Foam Insulation Panels
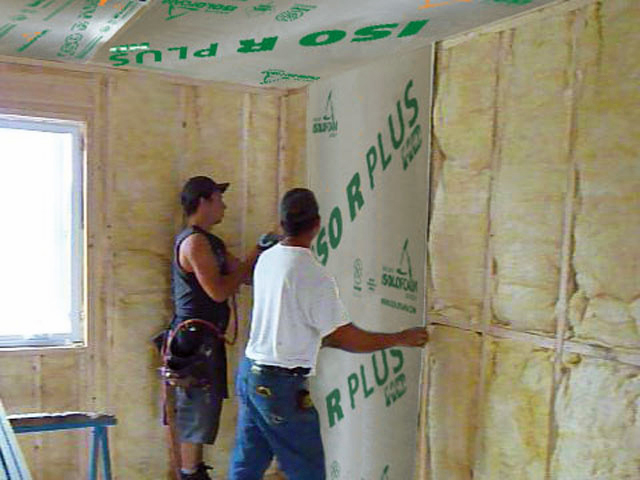
Installing Rigid Foam Insulation Panels is an easy and cost-effective way to improve the efficiency of your interior walls. It provides a layer of thermal insulation that will reduce energy costs and help you maintain a comfortable temperature all year long. To get started, you’ll need to purchase the right type of rigid foam insulation panels for your project.
The first step is to measure the area you plan to insulate. Once your measurements are taken, you’ll need to purchase the appropriate foam panels for the space. Rigid foam panels come in various thicknesses and sizes, so make sure to select the right option for your project. When your panels arrive, you’ll need to cut them to the proper size. This can be done with a sharp utility knife or a saw.
Once the panels are cut, you can begin the installation process. Start by attaching the panels to the studs of your interior walls using screws. Make sure to use the proper screws for your type of foam insulation. You’ll also need to use a caulk gun to fill any gaps between the panels and the walls. Finally, cover the edges of the insulation with drywall tape to finish the installation.
By following these steps, you can easily install Rigid Foam Insulation Panels on your interior walls. This will help you create a more efficient home while keeping energy costs low.
Sealing & Securing the Insulation
Installing rigid foam insulation is a great way to improve the energy efficiency of your home, and installing it on interior walls is relatively straightforward. However, once the insulation is in place, it is essential to make sure it is properly sealed and secured. This will ensure that the insulation is effective and that air won’t be able to escape around the edges.
The most important step in sealing and securing the insulation is to apply a vapor barrier. This will stop moisture from entering the wall cavity. To do this, you should attach a sheet of plastic sheathing to the wall, overlapping the edges of the insulation board. Use construction adhesive to adhere the plastic to the wall and seal the seams using plastic tape.
Next, you should secure the insulation in place. This can be done by attaching furring strips to the wall and then screwing the insulation board to the strips. This will make sure the insulation stays in place and won’t move or shift. Once the board is in place, you should use an expanding foam sealant to fill any gaps or cracks around the edges. This will ensure that air and moisture can’t get in.
Finishing Touches
Once the rigid foam insulation is installed, you’ll want to finish up the job with some finishing touches. These could include adding caulk around the edges of the foam insulation board, putting in some kind of weatherproofing tape, and providing extra insulation around any wiring that is running through the foam board. Also, it’s important to make sure that the foam board isn’t in contact with any combustible materials, such as wiring, or any other combustible material. Finally, if you are installing the foam board in a bathroom, you may want to caulk around the edges to ensure that water does not seep in. With these finishing touches, you can ensure that your rigid foam insulation is installed properly and will provide the most efficient insulation possible.
Troubleshooting & Maintenance
Troubleshooting and maintenance of rigid foam insulation can be a bit tricky, but with the right resources and know-how, it can be done with ease. When installing rigid foam insulation, it is important to make sure that the insulation is properly sealed and that all gaps and seams are properly caulked and sealed. It is also important to make sure that the insulation is not exposed to moisture, as this can cause it to deteriorate. Additionally, it is important to periodically inspect the insulation to ensure it is still properly installed and in good condition, and if there is any damage, it should be addressed immediately. It is also important to follow the manufacturer’s instructions when installing and caring for the insulation, as this will ensure optimal performance.
Conclusion
Installing rigid foam insulation on interior walls can be a great way to improve the energy efficiency of your home. It is relatively easy to install and can help reduce energy bills by keeping the temperature inside your home more consistent. It is important to take the time to properly measure and cut the pieces of insulation for your walls, and to use the right tools and materials to ensure a successful installation. With the right materials and some patience, you will be able to install rigid foam insulation on your interior walls quickly and easily.

