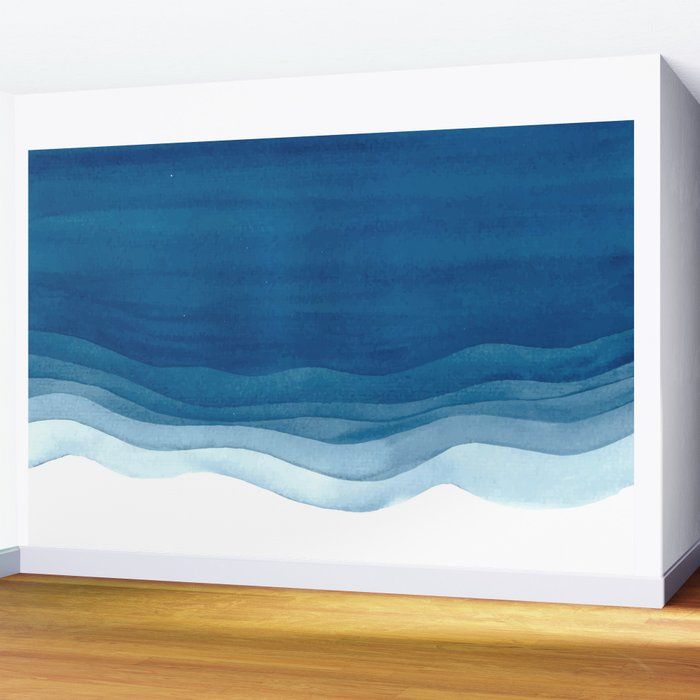
How to Paint Waves on a Wall
Start with a pencil sketch of the basic wave shape on your wall. Paint the waves in a light blue color. To add realism, use a darker blue color for the shadows and a white paint pen to add highlights.
- Begin by sketching out your wave design on paper
- Once you have your design, use painter’s tape to outline the waves on the wall
- Choose your paint colors and begin painting in the base color for your waves
- To create the illusion of movement, add a second lighter shade of paint to each wave
- Use a brush or sponge to blend the colors together
- Add in a third darker shade of paint to create depth and shadows within each wave
- Again, use a brush or sponge to blend the colors together
- Remove the painter’s tape and enjoy your new wall art!
How Do You Paint Simple Waves?
If you want to paint simple waves, there are a few things you need to keep in mind. First, you need to decide what kind of wave you want to paint. There are two main types of waves: tsunamis and regular waves.
Tsunamis are much larger and more powerful than regular waves, so they can be more difficult to paint. If you’re not sure which type of wave you want to paint, start with a regular wave. Once you’ve decided on the type of wave you want to paint, it’s time to choose your colors.
For a regular wave, use light blue for the sky and a darker blue for the water. You can also add some white foam at the top of the wave for realism. For a tsunami, use dark blue or even black for the water and add some white foam near the top as well.
Now that you have your colors chosen, it’s time to start painting! Begin by painting the sky with your light blue color. Then, using your darker blue color, start at the top of your paper and create an S-shaped curve downwards.
Fill in this S-shape with your dark blue color until it reaches about halfway down your paper. To finish off your wave, lightly draw some white lines across the dark blue area – these will be our foamy crests!

Credit: stepbysteppainting.net
How Do You Do the Wave Effect in Paint?
To do the wave effect in paint, you will need to start by creating a basic gradient. To do this, you will want to use two colors that are similar in shade. Once you have your gradient created, you will then need to add a new layer on top of it.
On this new layer, you will want to create a white line that goes from one side of the canvas to the other. Next, you will need to apply a Gaussian Blur filter to this new layer. The amount of blur will depend on how big or small you want your waves to be.
Once you have applied the filter, your image should now look like waves!
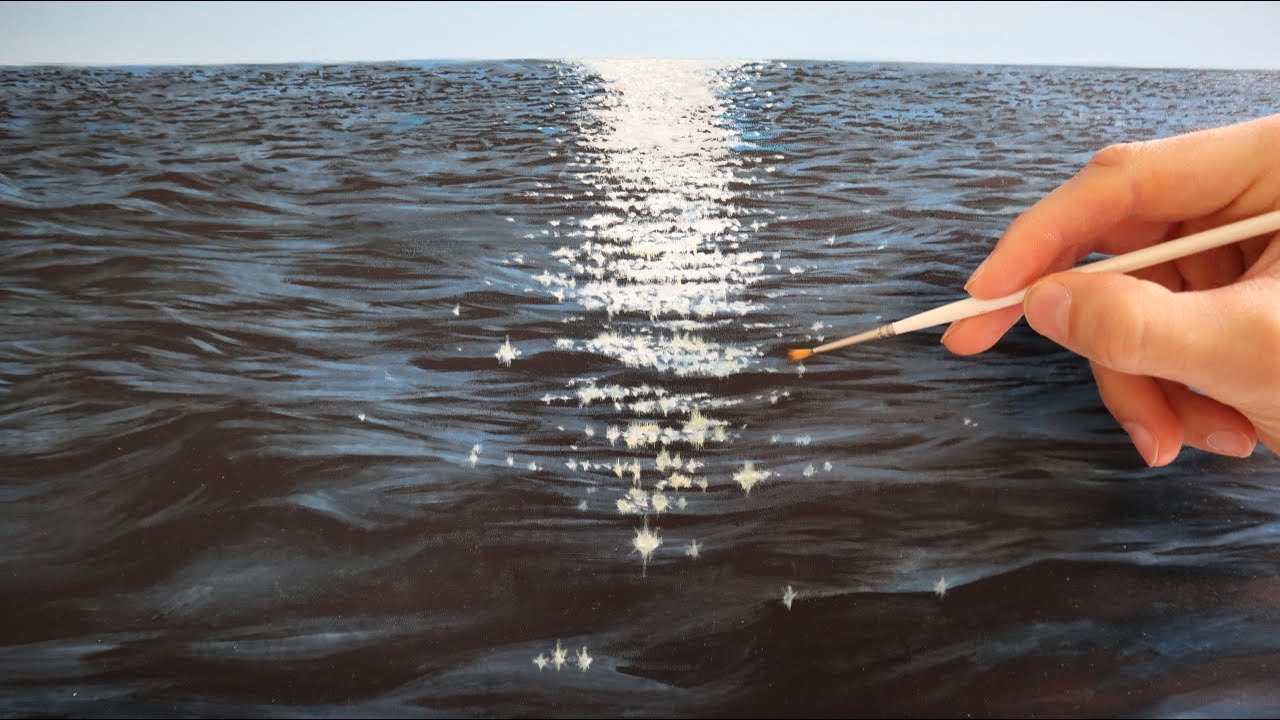
Credit: www.youtube.com
How Do You Paint a Perfect Wave?
To paint a perfect wave, you’ll need to start with a blue or green background. Next, add whitecaps using a small brush. Once the whitecaps are in place, use a larger brush to add the main wave.
Finally, use a smaller brush to add details like foam and spray.
How Do You Paint Ripple Waves?
There are a few different ways that you can paint ripple waves, depending on the effect that you’re going for. One way is to start with a light blue color and then add white paint to create lighter shades of blue. Once you have your desired shade, use a rippling motion with your brush to create the wave effect.
Another way is to start with a dark blue color and then add white paint to create lighter shades of blue. Use a rippling motion with your brush to create the wave effect.
How To Paint Waves – Lesson 1 – Shape
How to Paint Waves Easy Step by Step
Waves are one of the most popular subjects for painting, but they can also be one of the most challenging. This easy step-by-step guide will help you paint beautiful waves that will make your friends and family say “Wow!”
- Begin by sketching out your waves with a light pencil. It’s important to get the basic shape of the wave right before you start painting.
- Once you have the basic shape down, begin painting in the darkest areas with a dark blue or green color.
- Work in some lighter colors as you move towards the crest of the wave. You can use white, light blue, or even light yellow.
- To add realism, don’t forget to paint in some shadows along the underside of the wave. Use a darker color for these areas.
- Finally, add some highlights along the top of the wave with white or light blue paint. These will make your waves look shiny and realistic!
Conclusion
Painting waves on a wall can create a beautiful and calming ambiance in any room. By following a few simple steps, anyone can achieve this look. First, choose the right paint color.
A light blue or green will work best to create the illusion of water. Next, use painter’s tape to mark off where you want your waves to be. Once the tape is in place, begin painting your waves with slow, sweeping motions.
Start at the bottom of the wall and work your way up. Finally, remove the painter’s tape and enjoy your new ocean-inspired accent wall!