How to Quilt a Panel Wall Hanging
A panel wall hanging is a great way to show off your quilting skills. Here are some tips on how to quilt a panel wall hanging. First, you will need to gather your supplies.
You will need a quilt panel, batting, backing, and binding fabric. You will also need a sewing machine and thread, scissors, and a rotary cutter and mat. Next, you will need to cut the batting and backing to the same size as the quilt panel.
Then, you will lay the backing down on a flat surface the wrong side up. Next, you will lay the batting on top of the backing.
- Select a panel wall hanging that you would like to quilt
- Lay the batting on top of the wrong side of the fabric
- Use a rotary cutter and cutting mat to cut the batting to size
- Layer the backing fabric on top of the batting, wrong side up
- Pin all three layers together using quilting pins, taking care to pin through all three layers at once so they stay even as you work
- Start quilting in the center of the panel working your way out toward the edges in a consistent pattern
How Do You Quilt a Wall Hanging?
When most people think of quilting, they think of bedspreads or baby blankets. But you can also quilt wall hangings! Wall hangings are smaller than traditional quilts, so they’re a great way to try out new techniques or show off your favorite fabrics.
Plus, they’re quick and easy to make. Here’s how to quilt a wall hanging:
- Choose your fabric. You’ll need two pieces of fabric for the front and back of your wall hanging, plus batting and backing fabric. The front piece can be pieced together from several different fabrics, or you can use one large piece of fabric. Just make sure all the pieces are at least 6 inches larger than the finished size of your wall hanging.
- Cut the batting and backing fabric to size. The batting should be slightly smaller than the front and back pieces (about 4 inches smaller on each side). The backing fabric should be about 8 inches larger than the front and back pieces (4 inches on each side).
- Lay everything out on a flat surface with the wrong sides facing up. Place the backing fabric down first, followed by the batting, then the front piece(s). Make sure all three layers are smooth and free of wrinkles before you start pinning them together.
- Start in the middle of one side and work your way out towards the corners, placing pins every few inches along all three layers to hold them together securely while you sew them together.
- Use a sewing machine set to a medium-length stitch (about 2-3 mm) to sew along both sides and across the bottom of your quilt sandwich.
- Trim away any excess batting or backing fabric from around the edges of your quilt top.
- Finish off raw edges with binding tape or by hand stitching a wide zigzag stitch along all four sides.
- Hang up your beautiful new wall hanging!
How Do You Quilt Fabric Panels?
Quilting fabric panels is a great way to create a unique and personalized quilt. There are many different ways to quilt fabric panels, so you can choose the method that best suits your needs and preferences. Here are some tips on how to quilt fabric panels:
1. Decide on the size of your quilt. Fabric panels come in a variety of sizes, so you will need to decide how large you want your quilt to be before you select your panel.
2. Choose a backing fabric. This can be a solid color or a coordinating print. Make sure that the backing fabric is at least 2-3 inches larger than the panel on all sides.
3. Cut batting to size. Batting should also be 2-3 inches larger than the panel on all sides.
4. Lay out the panel right side up on top of the batting and backing fabrics (right sides together). Pin in place if desired.
5 If using a pieced border, sew it onto the perimeter of the panel now using a 1/4″ seam allowance before proceeding to
6. Sewing borders onto finished quilts can be more difficult and may cause puckering or rippling, so it’s best to do it before you start quilting if possible..
If not adding borders skip to step 6 5a) To calculate yardage for pieced borders: Measure distance around the entire perimeter of the project Divide that measurement by 36” (the width of most fabrics) Round up this number If using strips that are less than 36” wide, such as 2-1/2” strips, multiply this number x 2 Add 7” for each outside corner + 4“ for each inside miter joint ex: 84 ÷ 36 = 2 yds + 8″ (2 outside corners) + 4″ (2 inside miter joints) = 3 yds needed 5b) For strip widths wider than 36″: Measure distance around the entire perimeter of project Divide that measurement by WOF (width of fabric) Round down this number Multiply this new number by strip width used Add 7″ for each outside corner + 4″ for each inside miter joint
ex: 84 ÷ 42 = 1-7/8 yds needed | 1-7/8yds X 2-1/2″ strip width used = 4-7/8 yds needed | 4-7/8 yds + 8″ (2 outside corners) + 4″ (2 inside miter joints) = 6-3/4 yds needed
What Type of Batting Do You Use for a Wall Hanging?
There are a few different types of batting that can be used for wall hanging, but the most common is quilt batting. Quilt batting is typically made from cotton, polyester, or a blend of the two materials. It’s available in different thicknesses, so you can choose one that will give your wall hanging the level of padding and support that you want.
How Big Should a Quilted Wall Hanging Be?
When it comes to quilted wall hangings, size definitely matters! The general rule of thumb is that your quilted wall hanging should be at least two-thirds the width of your sofa or bed. This will ensure that it makes a big impact and really ties the room together.
Of course, you can always go bigger if you want to make a real statement! Just remember that a larger quilted wall hanging will require more fabric, batting, and time to complete.
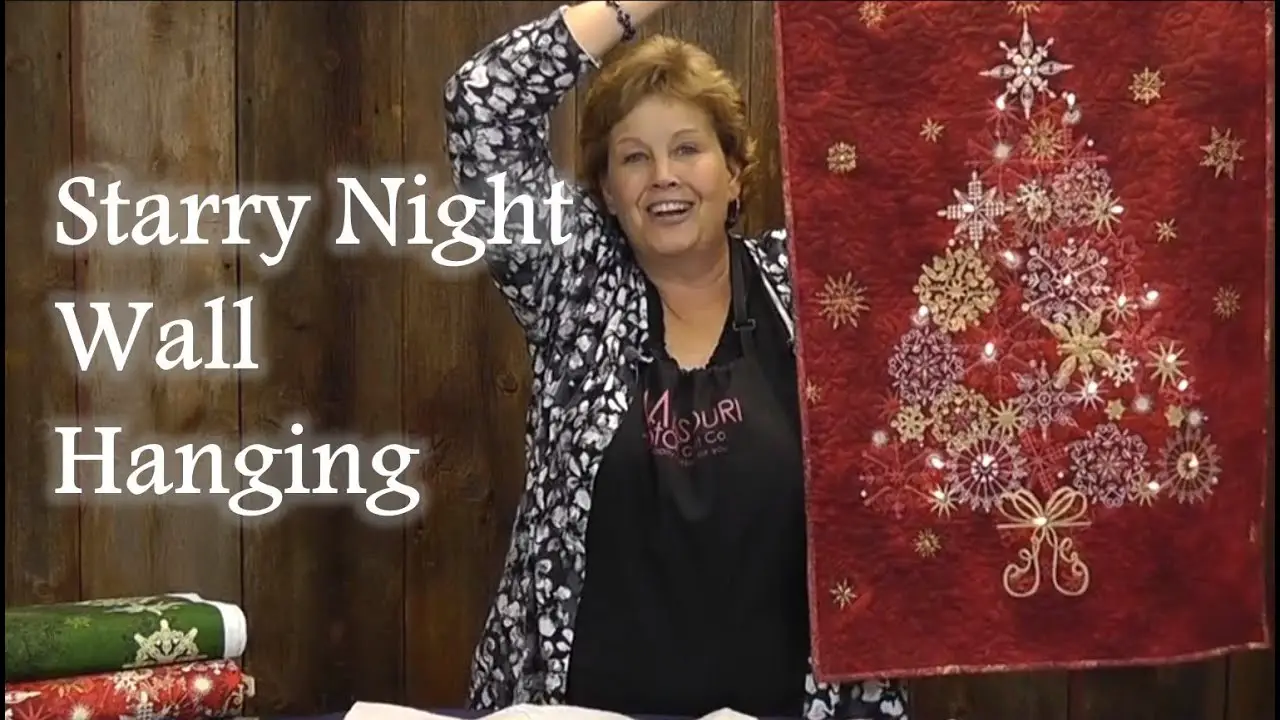
Starry Night Wall Hanging Quilt Panel Project
Machine Quilting Ideas for Panels
If you’re looking for some machine quilting ideas for panels, you’ve come to the right place! Panels can be a great way to add interest and dimension to your quilts, and there are endless possibilities when it comes to quilting them. Here are just a few ideas to get you started:
1. Start with a simple all-over stitch. This is a great way to get comfortable with machine quilting on panels, and it’ll give your quilt some nice texture. Try different stitch lengths and widths to see what you like best.
2. Get creative with your stitching lines! Quilting straight lines is fine, but try incorporating some curves or zigzags for added interest. You can also create unique patterns by stitching in different directions (horizontal, vertical, diagonal).
3. Use contrasting thread colors to really make your stitches pop. This is especially effective if you’re using a light-colored panel fabric. 4. Go big!
If you want your panel quilt to make a statement, go bold with your machine quilting designs. Large stitches and/or heavy-duty threads will help give your quilt an impressive look.
Conclusion
This blog post provides a detailed tutorial on how to quilt a panel wall hanging. It explains the supplies needed and walks through each step of the process, from choosing a design to piecing the quilt top to quilting and binding the finished product. With clear instructions and helpful photos, this post makes quilting a panel wall hanging seem like a breeze!