How To Use An Edger Paint
A paint edger is a great tool for quickly and easily painting clean, straight lines on walls and other surfaces. It’s especially helpful when painting around trim, baseboards, or in other tight spaces. With just a few simple steps, you can learn how to use an edger paint for a professional-looking result. First, make sure you have the right materials and tools. You’ll need a quality paint edger, painter’s tape, a roller and tray, and the paint of your choice. Next, attach the edger to the painter’s tape along the edge of the area you’re painting. Then, dip your roller into the paint, and apply a light, even coat to the edger. Finally, use the edger to paint along the edges of the area, and then remove the painter’s tape. With a few simple steps, you can quickly and easily paint a clean, straight line with an edger paint.
Materials Needed
When it comes to using edger paint, the first step is to make sure you have all the necessary materials. This includes a paint edger, a paint tray, a drop cloth, painter’s tape, and of course, the paint itself. It’s important to make sure you get the right type of paint for the job you’re doing. Many types of edger paint are available, but the most common are latex-based and oil-based paints. Latex-based paints are preferred for a variety of surfaces, while oil-based paints are better for certain materials, such as wood or metal. Additionally, you’ll need to make sure you have the right tools for edging, such as paint brushes, rollers, and edging pads. With all of the necessary materials in hand, you can get started on your edging project.
Prepping the Area
Proper preparation of the area before you begin to paint is essential for achieving a professional, high-quality finish. Before you begin painting, take the time to prepare the area by removing any furniture, rugs, or other décor that could be damaged by paint splatter. If the area is already painted, make sure to use a sander to remove any existing paint and rough up the surface to help the new coat of paint adhere better. It’s also a good idea to fill any holes or cracks with a spackling paste and sand the area smooth. Once the area is prepped, it’s time to use the edger paint.
Applying an Edger Paint
Applying edger paint can seem like a daunting task, but with the right steps and tools, it can be done in no time. To properly apply edger paint, you’ll need to start by preparing the surface. This includes sanding, cleaning, and priming the area where you plan to paint. Once the surface is prepped, you can begin painting. When applying edger paint, you’ll want to use a brush with synthetic bristles as they will provide an even finish. Be sure to use long, even strokes and to pay attention to the edges. If you’re using a roller, you’ll want to start at the top and work your way down, overlapping the edges with each pass. Once you’ve finished painting, it’s important to allow the paint to dry completely before touching up any edges or imperfections. With the right tools and techniques, applying edger paint can be a breeze.
Credit: nookly-uk.com
Preparing the Paint
Painting is a great way to spruce up any room in your house, but the process of prepping the paint can be intimidating. Before you begin painting, you’ll want to ensure that you’re properly prepared. An edger paint is a great tool for achieving a professional-looking finish, but it’s important to understand how to use it properly. Here are some tips for preparing the paint with an edger paint.
First, you’ll want to choose the right type of paint for your project. Different paints have different properties and are designed for different uses, so make sure you select the right one for the job. Once you’ve selected your paint, you’ll need to properly mix it. This can be a tedious task, but it’s important to ensure that the paint is properly mixed for optimal results.
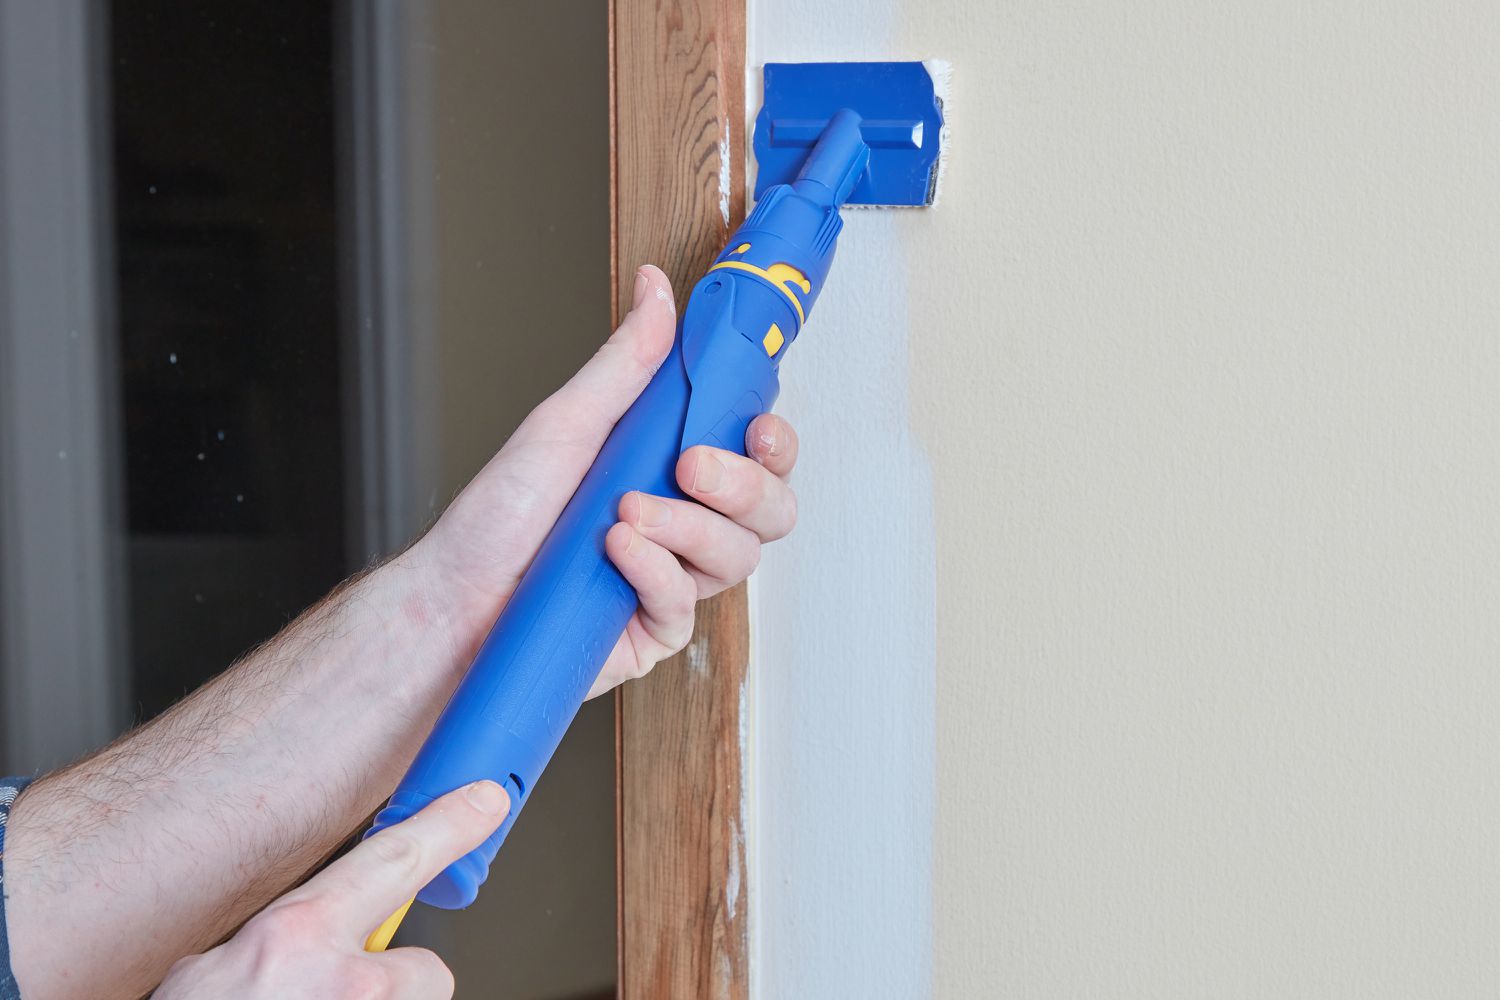
Next, you’ll need to apply a primer to the surface you’re painting. This will help the paint adhere better and provide a better finish. Once the primer is dry, you’ll be ready to use the edger paint. This tool helps you get a neat, professional-looking finish around windows, trim, and doorways without having to use a brush. To use the edger paint, you’ll want to start by pressing the tool against the corner of the wall, then slowly move it along the walls.
When using the edger paint, it’s important to keep your strokes even and consistent. This will help ensure that the paint is applied evenly and that you achieve the desired results. After applying the paint, let it dry and then add a top coat if desired. With a bit of practice and the help of an edger paint, you can achieve a professional-looking finish for your next painting project.
Painting with an Edger Paint
is a great way to achieve a professional finish.
Painting can be a daunting task for even the most experienced DIYers. However, with the right tools, techniques, and materials, it can be a breeze. Edger Paint is a type of paint specifically designed for edging and trim areas, and it can be used to achieve a professional look with minimal effort. Here’s how to use Edger Paint to achieve a perfect finish:
First, prepare the area you are painting. Make sure all surfaces are clean and dry, and any old paint is removed. Next, choose the right type of Edger Paint for the job. Different types of Edger Paint are formulated for different surfaces, so make sure to select the right one for your project. Once you have the right paint, use a brush or roller to apply it to the edges and trim of your project. Make sure to take your time and apply the paint evenly.
After the paint is applied, it’s time to use the edger tool. This tool is used to get a crisp, straight line along the edges of the project. Start at one end of the project and gently move the tool along the edges, making sure to get into all the corners and crevices. Use a damp cloth to wipe away any excess paint.
Finally, once the project is finished, make sure to give it time to dry and set. Once the paint is dry, you can apply a sealant or topcoat to add extra protection and shine. With these tips, you’ll be able to achieve a professional finish using Edger Paint.
Cleaning Up
Cleaning up after completing a painting project is an important step in the process, and having the right tools for the job is key. An edger paintbrush is one of the most useful tools for achieving professional-looking results as it allows you to paint in tight spaces and around edges with ease. To use an edger paintbrush, you’ll need to prepare the surface, choose the right paint, and take your time to ensure that the job is done correctly.
First, you’ll want to make sure that the surface you’re painting is clean and free of any debris. This will help create a smooth finish and ensure that the paint adheres properly. Next, choose the appropriate type of paint for the job, as certain paints are designed for specific jobs such as trim or walls. Once you have the right paint, you’ll need to load the edger paintbrush with the paint. To do this, dip the brush into the paint and then tap off the excess. Finally, start painting in small sections, using light strokes to create a smooth and even finish. Make sure to move the brush along the edge of the wall or trim to ensure that the paint is evenly applied.
Using an edger paintbrush can help you achieve professional-looking results, but it is important to take your time and follow the steps outlined above for the best results. With some patience and practice, you’ll be able to confidently tackle your next painting project with ease.
Troubleshooting Common Issues
Painting a room or a project is a great way to add a bit of color and personality to your home. An edger paint can make the job even easier and provide a professional-looking finish. However, it’s important to know how to use an edger paint properly and troubleshoot any common issues that arise.
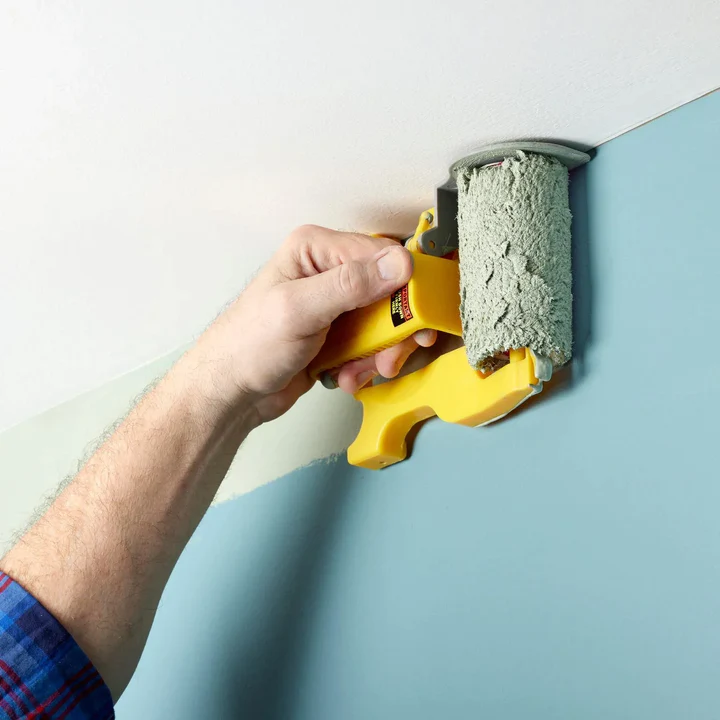
When using an edger paint, it’s important to take your time and ensure that you’re using the appropriate technique for the job. Start by cutting in the edges with a brush, then fill in the rest of the space with the edger. Make sure to keep the edger at a consistent angle and keep it moving at a steady pace. This will help you achieve the most even and professional-looking finish.
Common issues that arise when using an edger paint include streaks, splatter, and paint buildup. To prevent streaks, be sure to use long, even strokes and keep the edger moving. To minimize splatter, hold the edger away from the surface and keep the nozzle pointed downward. For paint buildup, ensure that the edger is clean and free of any dried paint before beginning the job.
It’s also important to select the right edger paint for the job. Consider the type of surface you’re painting and the desired finish. There are a variety of edger paints available on the market, so make sure to choose the one that best fits your needs.
By following the appropriate technique and troubleshooting any common issues, you can ensure a professional-looking finish with your edger paint. With a bit of practice, you’ll be able to achieve the perfect paint job every time.
Tips for Best Results
Using an edger paint can be a great way to spruce up the look of your walls, but it is important to use the right techniques to get the best results. Here are a few tips to ensure that your edger paint project turns out great.
First, it is important to prepare the surface before edger painting. This means cleaning the wall and applying a primer if needed. Once the wall is prepped, use painter’s tape to create a crisp line around the edges of the wall that you will be edging. This will help ensure that you have a straight line when you start painting.
When you are ready to paint, use a high-quality paintbrush that is specifically designed for edging. This type of brush is usually smaller and thinner, which allows you to get in the small corners and edges that you are trying to paint. Also, make sure to use even, consistent strokes when painting. This will help you achieve a smooth, uniform finish.
Finally, when you are finished painting, remove the painter’s tape immediately. If you leave it on too long, the paint can dry onto the tape and create an uneven line when you remove it.
By following these tips, you can ensure that your edger paint project turns out looking great. With the right preparation, techniques, and tools, you can easily give your walls a polished, professional look.
FAQs About the How To Use An Edger Paint
What type of paint should I use with an edger paint?
You can use any type of paint that is designed for use on walls and ceilings, such as latex paint. Make sure to read the instructions on the label to ensure that you are using the correct type of paint for your application.
How do I prepare the surface before using an edger paint?
You should make sure to clean the surface before applying the paint. Wipe down the walls with a damp cloth to remove any dirt or dust. You may also need to sand the surface if it is uneven or has other imperfections.
What is the best way to apply an edger paint?
You should start by using a roller to paint the edges of the walls. Once the edges are painted, use an edger brush to paint the corners and other tight spaces that the roller cannot reach. Finally, use a paintbrush to paint the rest of the wall.
Conclusion
Using an edger paint is a great way to add a professional touch to any painting project. It is easy to use and can help you achieve a precise, clean edge to any paint job. To use an edger paint, start by preparing the area to be painted, making sure to remove any dirt or debris and creating a straight, even line. Next, apply the edger paint onto the area, using long, even strokes and working from the inside out. Once you have finished painting the edges, allow the paint to dry before applying a final coat of paint to the entire area. With a few simple steps, you can use edger paint to create a professional-looking finish to any painting project.