Tile A Small Bathroom
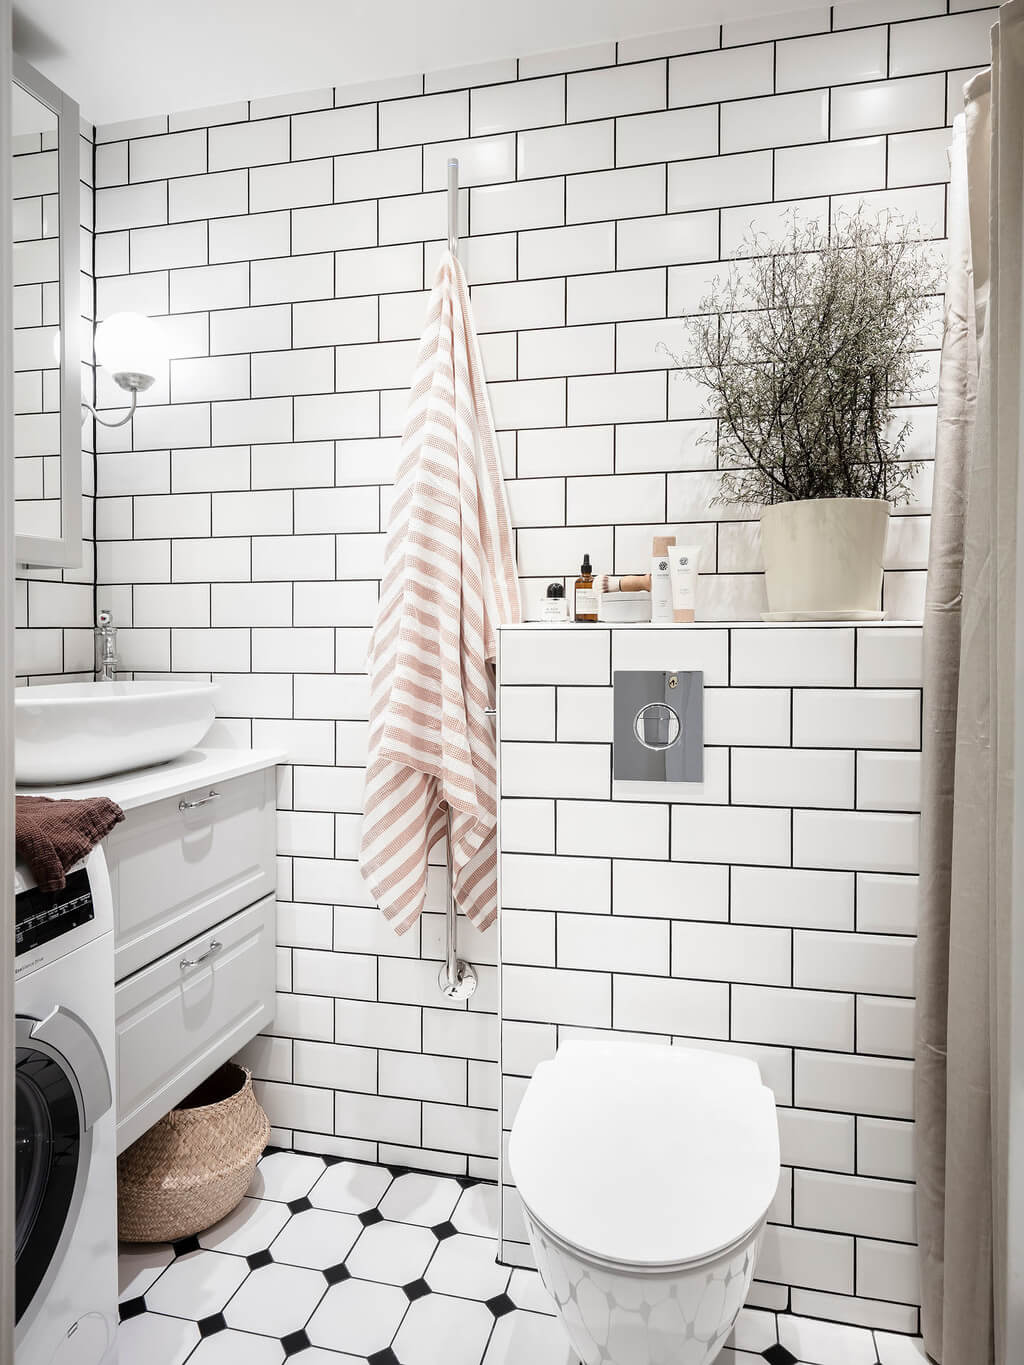
Tile is a popular choice when it comes to small bathrooms. It is a durable material that can add character to the space and is easy to clean. It also comes in a wide variety of styles and colors, so it’s easy to find something that will fit your style and the design of the rest of your home. From classic white subway tile to colorful mosaic tile, there’s a tile option that’s perfect for any small bathroom. Before you get started, it’s important to consider the size of the space, the amount of light it receives, and the budget you’re working with. With the right tile, you can make your small bathroom look bigger and more inviting.
Choosing the Right Tiles
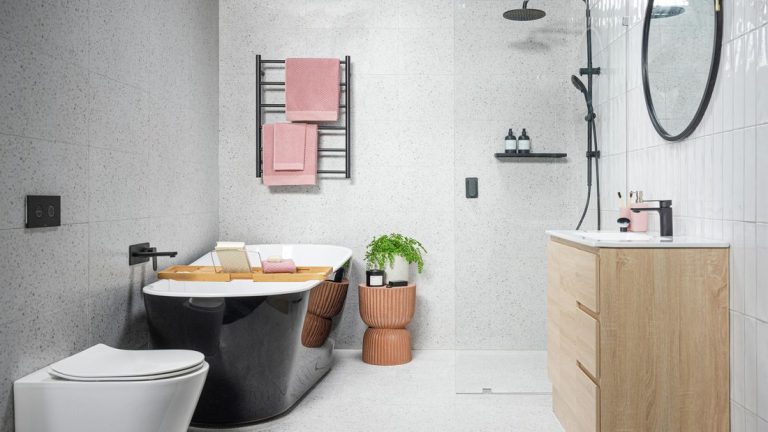
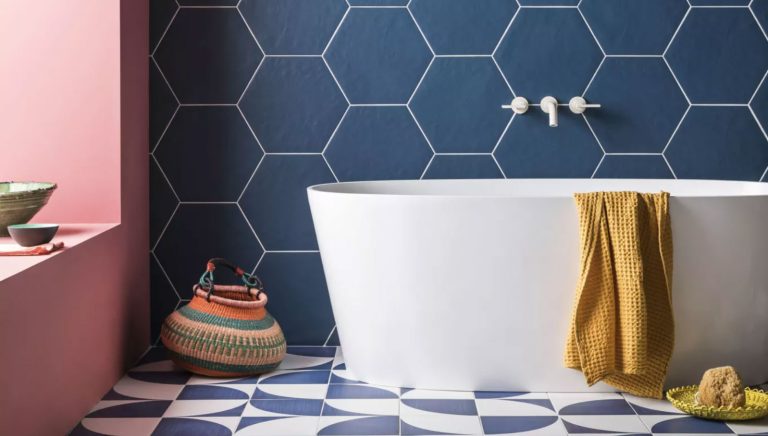
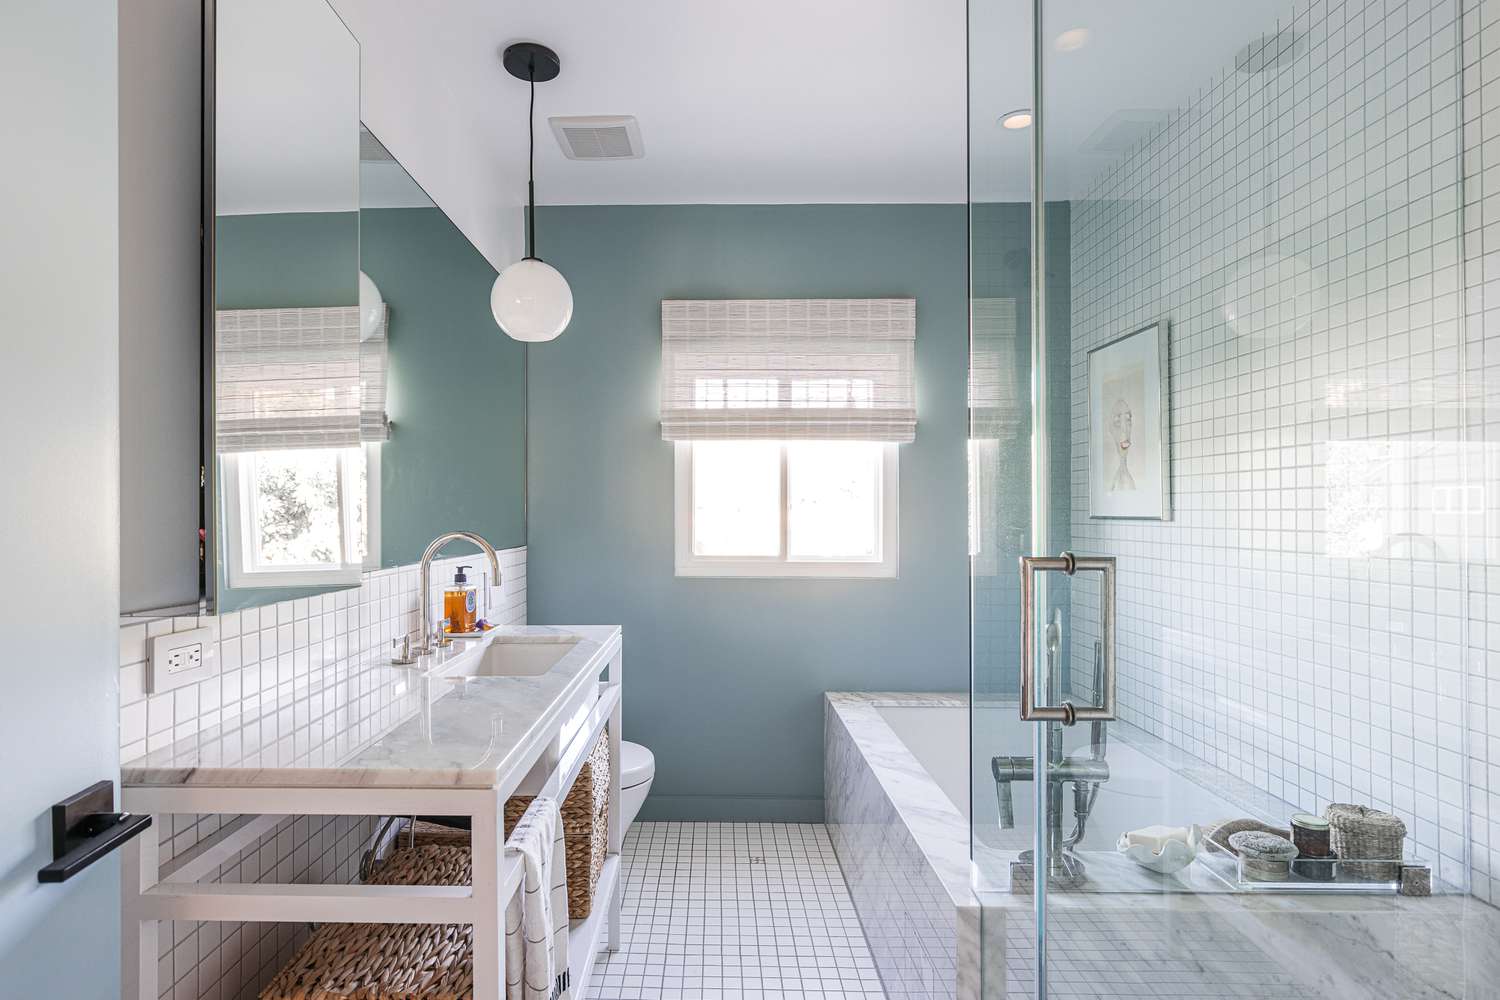
Making sure you choose the right tiles for your small bathroom is essential to ensure the space looks its best. The right tile can open up a small bathroom, making it feel larger, brighter, and more inviting. The wrong tile can make a bathroom feel cluttered and claustrophobic. To help you make the right choice, consider the following factors.
First, think about the size of the tiles. Smaller tiles can make a small bathroom look bigger, while larger tiles can overwhelm it. Second, consider the texture of the tiles. Sleek and glossy finishes can reflect the light and make a small bathroom feel more spacious. Third, look at the color palette of the tiles. Cooler colors can make the room appear larger, while bold colors can add a pop of personality.
Finally, consider the grout color. Light or white grout can make tiles look seamless, creating a more spacious feel. Darker grout can create a contrast that can define the space and make it feel cozier. With these tips in mind, you can choose the right tiles for your small bathroom and make it look its best.
Preparing the Room
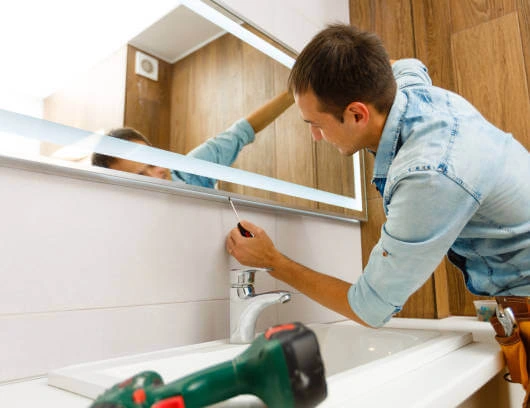
Preparing the room is the first step to tiling a small bathroom. Before you begin, it is important to make sure that the walls and floor are ready to receive new tiles. Begin by removing any existing tiles, wallpaper, and other wall coverings. If there is any existing grout, use a grout removal tool to remove it. Once the walls and floor are cleared, use a damp cloth to wipe away any dust or dirt. You should also check the walls for any signs of water damage or cracks, as these will need to be repaired before you can start tiling. Once these preparations are complete, you can begin tiling your small bathroom.
Laying the Tiles
Tiling a small bathroom can be a daunting task. But with the right tools, planning, and a bit of patience, you can transform your bathroom into a stylish and modern space. When it comes to laying the tiles, the most important step is to plan out the layout and design of your tiles. This is because the layout can drastically affect the final look and feel of the bathroom. It is important to ensure that the tiles are laid in the right direction and that there is sufficient grouting between each tile. When laying the tiles, it is important to use the right adhesive and to allow for a slight expansion gap. Once the tiles are laid, the grouting must be done correctly to ensure that the tiles are securely attached. Finally, it is important to seal the tiles to protect them from moisture and to prevent mold and mildew from forming. With the right tools, planning, and patience, you can lay the perfect tiles for your small bathroom and create a stunning look.
Grouting the Tiles
Grouting the tiles is an essential step in creating a beautiful, lasting tile installation. It seals the gaps between tiles and prevents water from seeping in and damaging the wall or floor. Grouting can be a tricky endeavor, however, so it’s important to take your time and do it right. Here are some tips for grouting a small bathroom.
Begin by cleaning the area you’re going to grout. Remove any dirt or debris and make sure the surface is smooth and dry. Next, mix the grout according to the manufacturer’s instructions. Make sure to use the right type of grout for your tiles. Once the grout is mixed, apply it to the tiles with a rubber grout float, pushing it into the gaps between the tiles. Wipe away any excess with a damp sponge.
Once the grout is dry, apply a sealer to protect it. This will help keep the grout looking like new and prevent staining and discoloration. Finally, clean the area with a mild detergent and warm water.
Grouting a small bathroom can seem intimidating, but with the right tools and techniques, it’s a straightforward process. Taking the time to do it right will ensure your tile installation looks beautiful for years to come.
Sealing the Tiles
Adding tiles to your small bathroom is a great way to give it a fresh, modern look. But once the tiles are in place, you need to seal them to protect them from moisture, dirt, and other elements. Sealing your tiles is an important step in the process of finishing your bathroom remodel.
There are several types of sealers out there, and the one you choose will depend on the type of tiles you have. For example, natural stone tiles like marble and granite should be sealed with a penetrating sealer that penetrates the tile and fills in any cracks and crevices. Ceramic and porcelain tiles, on the other hand, should be sealed with a surface sealer.
When it comes to applying the sealer, you want to make sure you do it properly. Start by cleaning the tiles with a mild detergent and water. Once the tiles are clean and dry, apply the sealer in an even layer and allow it to dry completely. Be sure to follow the instructions on the sealer’s packaging for the best results.
Sealing your tiles is an important step in the bathroom remodeling process. By taking the time to do it properly, you can ensure that your small bathroom is protected from moisture, dirt, and other elements. With the right sealer and application technique, you can enjoy your bathroom for years to come.
Adding Finishing Touches
Once you have completed the major steps to tile a small bathroom, it’s time to add the finishing touches. This includes the trim, grout, caulk, and sealant.
Trim is a great way to add a decorative touch to the bathroom. You can choose from a variety of materials, such as wood, metal, or plastic. When installing trim, make sure that it is level and secure.
Grout is used to seal the tiles and prevent water from seeping through. It is available in a variety of colors to match the tile. Make sure to read the directions carefully and apply the grout evenly.
Caulk is used to fill in the gaps between the tile and the wall. This prevents moisture from seeping in and damaging the walls. Use a caulk gun and apply a thin, even bead of caulk.
Finally, sealant is used to protect the tiles and grout from dirt, stains, and moisture. It is important to use a sealant that is specifically designed for the material of the tile. Apply the sealant evenly and allow it to dry completely before using the bathroom.
By following these steps, you can tile a small bathroom and add the finishing touches that will make it look beautiful and last for years. With the right tools and materials, you can easily complete this project and add value to your home.
Maintaining your New Bathroom
As the proud owner of a newly renovated tile bathroom, you’ve likely invested a significant amount of time and effort into making your space look stunning. But to keep your small bathroom looking just as beautiful for years to come, regular maintenance is key. To help you ensure your bathroom stays in tip-top shape, here are a few easy tips to help you maintain your newly tiled bathroom.
First, perform regular deep cleans – dirt and grime can build up on your tiles over time, so it’s important to give your bathroom a thorough clean every few weeks. Be sure to use a non-abrasive, pH-neutral cleaner on your tiles to avoid any damage. Additionally, you’ll want to keep an eye out for any mold or mildew. If any surfaces are looking a bit damp, dry them off with a cloth and use a mold-inhibiting product to keep them from returning.
Second, address any repairs quickly – if you notice any chipped or cracked tiles, make sure to address them right away to prevent any further damage. If any of the grout is looking a bit worn down, you can easily re-grout the tiles.
Finally, use the right sealant – to protect your tiles and grout from dirt, water, and other contaminants, you’ll need to apply a sealant every few months. Make sure to use a sealant that’s specifically designed for tiles, as this will provide the best protection.
By following these tips, you can ensure your newly tiled bathroom remains looking beautiful and pristine for years to come.
Troubleshooting Common Problems
Tackling a tiling project is a great way to give your bathroom a complete makeover. But it’s important to know what you’re getting into and be prepared for any potential problems that may arise. From dealing with leaky pipes to how to make sure your tile is securely in place, there are a few things you should know before starting a tiling project in a small bathroom. Here are some tips to help you troubleshoot common problems that you might encounter.
First, it’s important to make sure that your small bathroom is properly waterproofed. Check that all the necessary sealants, grouts, and caulks are in place to prevent water damage. Additionally, you should be mindful of any potential plumbing issues that could arise when tiling a small bathroom, such as leaky pipes or plumbing fixtures. Before tiling, inspect all the pipes and faucets for any signs of damage and make sure to fix them before proceeding.
Another common problem when it comes to tiling a small bathroom is making sure that the tiles are securely in place. Since there’s often limited space in a small bathroom, it’s important to take extra care when laying out the tiles. Make sure to use the correct adhesive and grout when installing the tiles to ensure they are strong and durable.
Finally, it’s important to consider how to make the most of the space in your small bathroom. If you’re limited on space, look for tiles that are designed for smaller spaces, such as smaller rectangles, rather than large tiles. Additionally, use colors and textures to create the illusion of space, or opt for a monochromatic look.
Overall, tiling a small bathroom can be a great way to give it a much-needed facelift. Just remember to be prepared for any potential problems that may arise and keep these troubleshooting tips in mind. With the right preparation and attention to detail, you can achieve a beautiful and functional tiled bathroom.
FAQs About the Tile A Small Bathroom
What is the best way to tile a small bathroom?
The best way to tile a small bathroom is to begin by properly preparing the surface you plan to tile. Use an appropriate primer and adhesive and make sure the walls and floors are smooth and even. Then, use small tiles to create a visual pattern and avoid overwhelming the room.
How do I choose the best tile for my small bathroom?
When selecting tiles for a small bathroom, opt for light colors and smaller tiles, which will help the room look bigger. Additionally, select tiles that are easy to clean and won’t show dirt easily. Consider the texture of the tiles as well, as rough textures can create a sense of space.
What are the best tips for small bathroom tiling?
When tiling a small bathroom, it’s important to measure and plan your tiles ahead of time. Additionally, use grouting and sealants to prevent water damage, as well as accents and borders to create a more visually interesting and spacious look. Finally, be sure to use a level and straightedge to ensure proper installation.
Conclusion
The best way to tile a small bathroom is to keep the design simple and use tiles that are the same size. You should also consider the color of the tiles to make the room look bigger and brighter. When adding grout, be sure to use a light-colored option to keep the room looking open and airy. With the right tile choice, you can make your small bathroom look bigger and more inviting.