How to Build a Garage Floor Out of Wood
If you’re looking for a quick and efficient way to build a garage floor out of wood, then this article is for you. Building a garage floor from wood can be accomplished in just a few simple steps that will have your new sturdy and stylish wooden floor ready in no time. Not only is this an easy task but it also comes with the added benefit of being cost-effective as well!
By following these easy steps, anyone can create their own one-of-a-kind garage floor using nothing more than some basic materials and tools. First off, you’ll want to make sure that the area where your project will take place has been properly prepped before beginning construction. This means ensuring that all debris or other items are removed from the space so that there won’t be any surprises when it comes time to install your wooden planks.
Additionally, if you plan on painting or staining your finished product, this would also need to be done prior to installation.
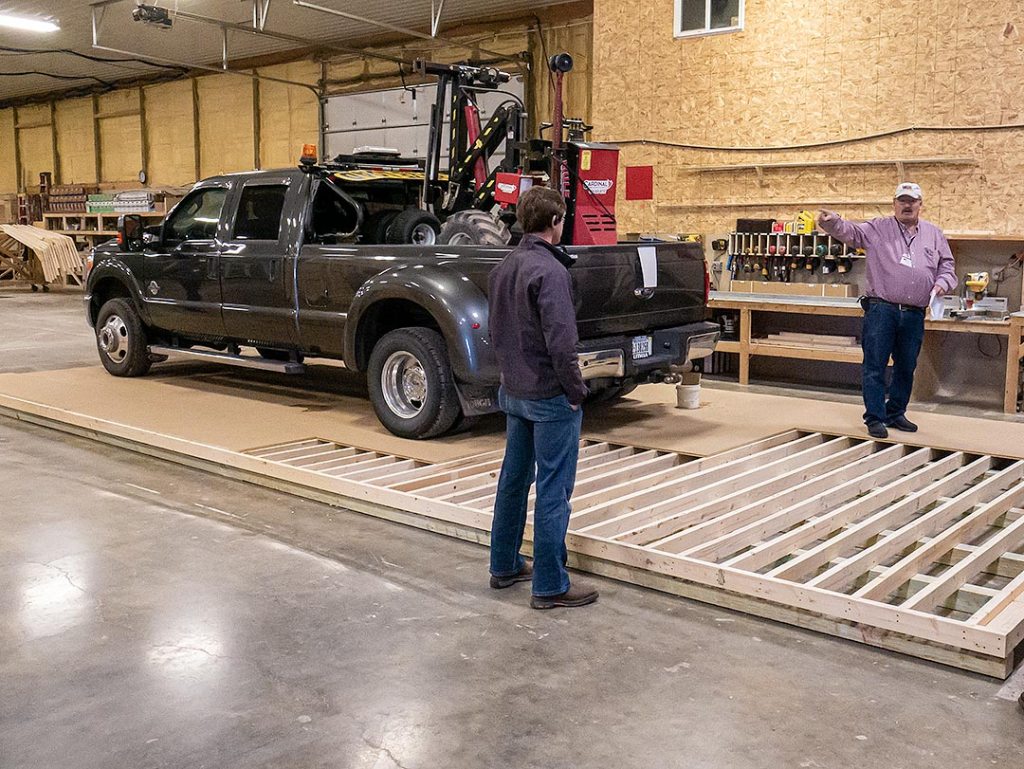
- Step 1: Gather the Required Materials. You will need 2×6 lumber, pressure-treated 4×4 posts, concrete mix, and gravel to build a garage floor out of wood. Make sure you have enough material to complete the job, as well as tools such as a saw and drill with bits for drilling pilot holes in wood
- Step 2: Construct the Frame. Use the 2×6 lumber to construct a frame around your garage space using either nails or screws for stability. The frame should be roughly 8 inches high so that it is able to support the weight of your car without buckling over time from strain
- Step 3: Install Pressure-Treated Posts at Each Corner of Your Frame. Place one post at each corner of your frame using pressure treated 4x4s for added stability and strength when supporting heavyweights like cars or other vehicles on top of them once completed. Secure these posts into place by driving galvanized spikes through their bases directly into the ground beneath where they are placed in order to secure them firmly in place before continuing any further steps
- Step 4: Fill In Any Holes Between Posts With Gravel OR Concrete Mix. Using either gravel or concrete mix (depending on what you prefer), fill in any gaps between posts until all four corners are covered with either material so that there is no open space left which could cause instability down the road when you drive onto it eventually with your car(s). This step will also help provide additional drainage during wetter weather conditions too!
Wooden Floor Strength Support Vehicle
When it comes to supporting heavy vehicles, there is nothing better than a wooden floor. Wooden floors have long been used in the transportation industry because of their strength and durability. A wooden floor can easily support the weight of large trucks and other heavy-duty vehicles without buckling or cracking under pressure.
Wooden floors are constructed using strong hardwoods such as oak, maple, and birch which provide superior strength and stability when compared to other materials like concrete or steel. This makes them ideal for use in applications where heavy loads must be supported over long distances with minimal stress on the underlying structure. The wood’s natural fibers also help absorb shocks from impacts that would otherwise cause significant damage to more fragile surfaces like asphalt or pavement.
Additionally, these same fibers increase traction for both stationary objects (such as parked cars) as well as moving ones (like buses). As a result, wooden floors are often seen in garages, parking lots, warehouses, etc., where they provide maximum safety for drivers and pedestrians alike by reducing slip-and-fall accidents due to slippery surfaces caused by oil spills or wet weather conditions. Finally, since wood is naturally fire resistant it makes an excellent choice when dealing with combustible materials such as gasoline or diesel fuel tanks which could potentially ignite if exposed directly to flames.
By utilizing a sturdy wooden floor you can rest assured that your vehicle will remain safe even during extreme temperatures or environmental hazards like floods and earthquakes! Overall, there are many benefits associated with choosing a wooden flooring option over traditional alternatives when constructing structures intended to support high-capacity vehicles – such as tractor-trailers – making this type of material an excellent choice no matter what kind of project you’re working on!
Credit: www.youtube.com
Can You Build a Garage With a Wood Floor?
Yes, you can build a garage with a wood floor. While it is not the most common choice of material for garages, wood floors are becoming increasingly popular due to their low cost and easy installation. The first step in building your wooden garage floor is to prepare the foundation.
This should be done by pouring concrete footings that will provide adequate support for the weight of any vehicles or heavy items that may be stored inside your garage. If you live in an area where there is a risk of flooding or water damage, it might also be wise to invest in waterproofing solutions such as polyethylene sheets or tarps beneath your concrete footing before laying down the rest of the flooring materials. Once this has been completed, you can install either plywood subfloors or interlocking deck tiles directly on top of your existing foundation.
Plywood subfloors are typically made from three layers: underlayment (which provides additional insulation), plywood sheets (for stability), and finish hardwood boards (for aesthetic appeal). These types of floors tend to last longer than other options but require more time and effort during installation because each layer needs to be securely fastened together using screws and glue. Interlocking deck tiles offer an easier solution since they snap into place over pre-existing surfaces without needing extra tools or labor involved – making them ideal for DIYers looking for an easy weekend project!
When choosing which type of wood flooring material works best for your particular situation, consider factors like climate conditions as well as traffic levels within the garage space itself so that you can select something durable enough to withstand long-term use without having too much maintenance required afterward – cedar planks are often recommended due to their natural resistance against rot/moisture while pine boards offer better affordability if budget constraints exist! Additionally, remember that regardless of which option is chosen all surfaces should still receive regular cleaning/treatment throughout their lifetime to maintain maximum protection against environmental factors like moisture/temperature changes etcetera; this way it’ll look beautiful year after year no matter what kind was initially used during the construction phase!
Should a Garage Floor Have a Slope?
When it comes to your garage floor, one of the most important things you need to consider is whether or not it should have a slope. While many people think that having a sloped garage floor isn’t necessary, there are actually several good reasons why you should give serious thought to including this feature in your design plans. The first and perhaps most important reason for giving consideration to incorporating a slope into your garage floor design is that it can help prevent water from pooling on the surface.
This is especially true if you live in an area where rain and snowfall can be frequent or heavy during certain times of the year. By adding a slight downward gradient, any precipitation that lands on your garage floor will run off towards the lowest point rather than collecting in puddles and potentially damaging whatever items you might store inside your space. In addition, having a slightly sloped floor makes sweeping out debris much simpler since dirt has somewhere to go instead of accumulating along walls and corners as would otherwise happen with flat floors.
This helps keep everything looking neat while also reducing dust buildup which could cause health problems if allowed to accumulate over time due to poor air circulation inside enclosed spaces like garages. Finally, another benefit of creating even just a minimal incline when constructing or refurbishing your garage’s surfaces is improved drainage for vehicles parked within its confines; this means less mud being tracked in throughout wet seasons as well as better protection against oil spills caused by accidental drips from cars after maintenance work has been performed. Overall then, there are several distinct advantages that come with installing some kind of slope on the surface of garages – from improved drainage capabilities through preventing pooling water accumulation down to making cleaning easier too!
With all these points taken into account then it’s clear why having at least some degree of incline when laying out new floors (or refurbishing existing ones) can be such an effective choice – so make sure not to forget about this simple yet crucial factor when planning out how best use yours!
What is the Best Surface for a Garage Floor?
When it comes to the best surface for your garage floor, you have a lot of options. The type of flooring you choose will depend on your budget and how much maintenance you want to do. There are several types of floors that can be used in garages such as concrete, epoxy, vinyl tiles, and interlocking mats.
Each option has its own advantages and disadvantages so let’s take a look at each one in more detail: Concrete: Concrete is probably one of the most common choices when it comes to garage floors due to its affordability and durability. It’s also relatively easy to install but there are some drawbacks; if not sealed properly, concrete will crack or chip over time and oil stains can be difficult to remove once they have set in.
Epoxy: Epoxy is an attractive choice because it adds a bit of color while protecting against wear and tear from vehicles or heavy equipment stored inside the garage. However, this type of coating does require regular maintenance if you want it to last longer than one season – meaning occasional re-coating may be necessary every few years depending on usage levels. Additionally, epoxy can become slippery when wet which could lead to slips/falls inside the garage (not ideal!).
Vinyl Tiles: Vinyl tiles are another great option for those looking for something cost-effective yet still aesthetically pleasing within their space – especially since there are so many colors/patterns available now! They provide good cushioning underfoot which makes them suitable for use with heavy machinery too – however, like anything else, they should be regularly checked/maintained (i.e., replaced as needed) in order to keep them looking nice over time. Additionally, vinyl tiles tend not to be slip resistant so this should also be taken into consideration before making your final decision!
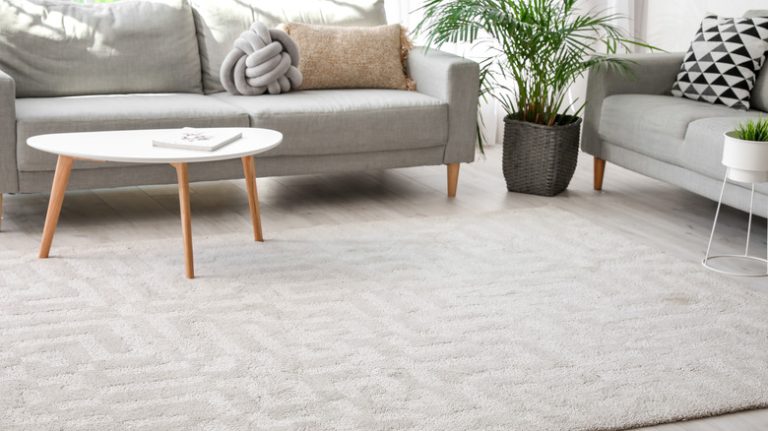
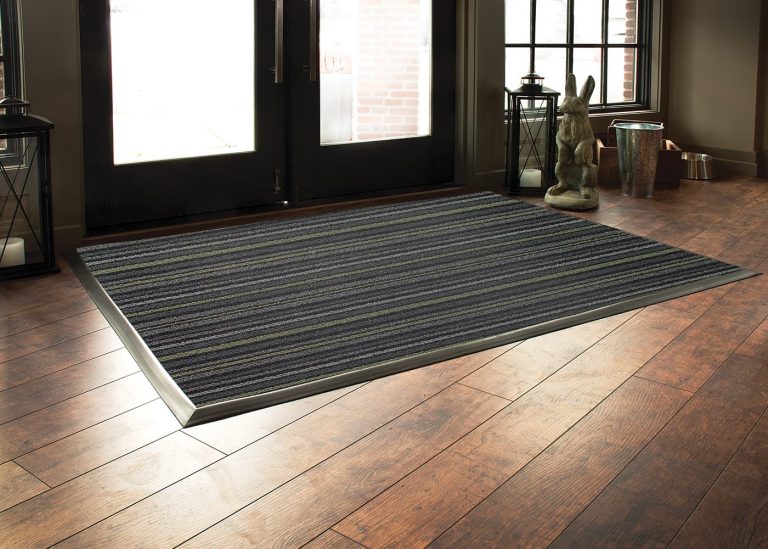
Interlocking Mats: Interlocking mats are typically made out of rubber or foam material and offer great cushioning underfoot while providing decent traction – even when wet! Unlike other types of floor coverings though these mats tend only last 1-2 seasons due to frequent exposure to sunlight; plus they need to be cleaned often otherwise dirt build up between pieces quickly becomes noticeable (which isn’t very appealing visually). Overall, choosing the best surface for your garage really depends on what kind of traffic goes through the area as well as how much money willing spend upfront to maintain upkeep throughout the year(s)!
How Can I Cover My Garage Floor Cheaply?
If you’re looking for a cheap way to cover your garage floor, there are several options available. The best option for covering your garage floor on the cheap will depend on what type of surface is already present and how much time and effort you are willing to put into it. The most inexpensive way to cover an existing concrete garage floor is with paint or epoxy coating.
Epoxy coatings are easy to apply and provide an attractive finish that lasts for years. They come in a variety of colors and can be applied using simple rollers or brushes, making them ideal for DIY projects. However, they require some preparation prior to the application including cleaning the surface thoroughly and filling any cracks or fractures with caulk before painting or rolling out the epoxy.
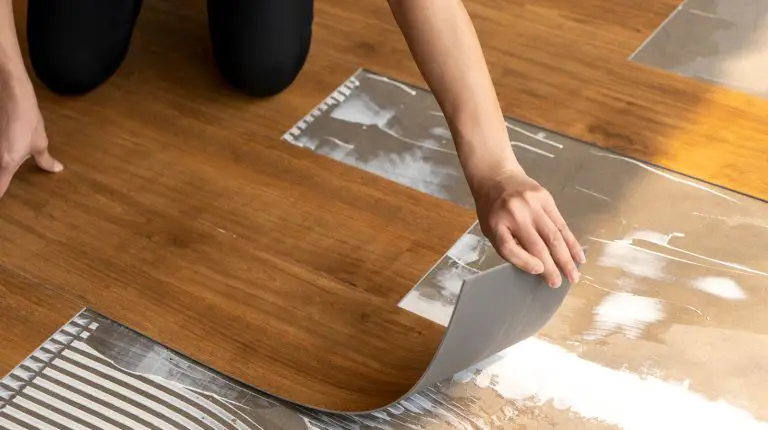
Additionally, multiple coats may need to be applied depending on the desired finish and level of protection needed from stains or other damage over time. Another cost-effective option for covering your garage floor is by using interlocking tiles made from plastic, rubber, foam, or vinyl material. These tiles snap together easily without adhesive so they’re easy to install yourself while creating a protective barrier against moisture as well as wear-and-tear damage caused by vehicle traffic in garages with driveways leading directly inside.
Interlocking tile mats also offer cushion which helps reduce fatigue when standing during long periods of time working in the garage as well as providing insulation against cold temperatures during winter months. Furthermore, these tiles can usually be purchased in bulk at discount prices which makes them even more affordable than traditional methods like epoxy coatings. Finally, if you’re looking for something even cheaper than either of these two solutions mentioned above, consider laying down rugs or carpets specifically designed for use within garages rather than purchasing expensive materials such as epoxies or interlocking tiles.
Rugs not only add color but also help protect floors by absorbing dirt & oil spills while keeping feet warm when stepping onto cold surfaces during colder weather conditions. Carpets work similarly but tend to provide better levels of soundproofing which could prove beneficial if noise levels become problematic due to frequent car usage within enclosed spaces such as garages. Whether opting for rugs/carpeted solutions versus more permanent alternatives such as epoxies/interlocking tile mats depends entirely upon personal preference & budget constraints – however, all three options discussed should generally suffice towards providing adequate coverage cheaply regardless!
DIY CHEAP Garage Floor!!
Conclusion
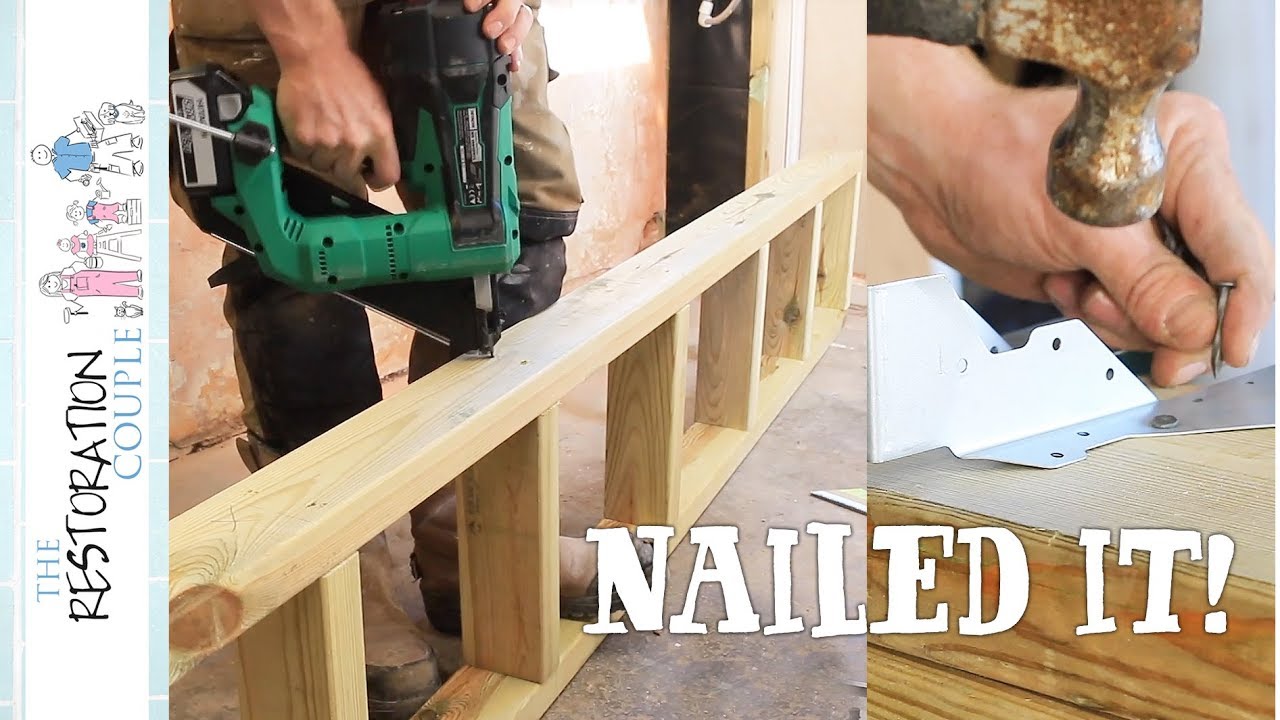
Building a garage floor out of wood is an affordable, effective way to create a sturdy base for your vehicle and other items. It’s also relatively easy to do if you have the right tools and materials. To start, you’ll need plywood sheets that are cut in sizes according to your measurements (these can be purchased at any hardware store).
Once all pieces are cut, lay them down on top of each other so that they overlap slightly; this will ensure stability when the floor is complete. Secure each sheet with 2-inch screws and then add additional support beams underneath as needed. Finally, seal the edges with caulk or epoxy sealant before applying paint or stain for protection against moisture damage.
With these steps followed correctly, you should have a strong wooden garage floor that will last many years!