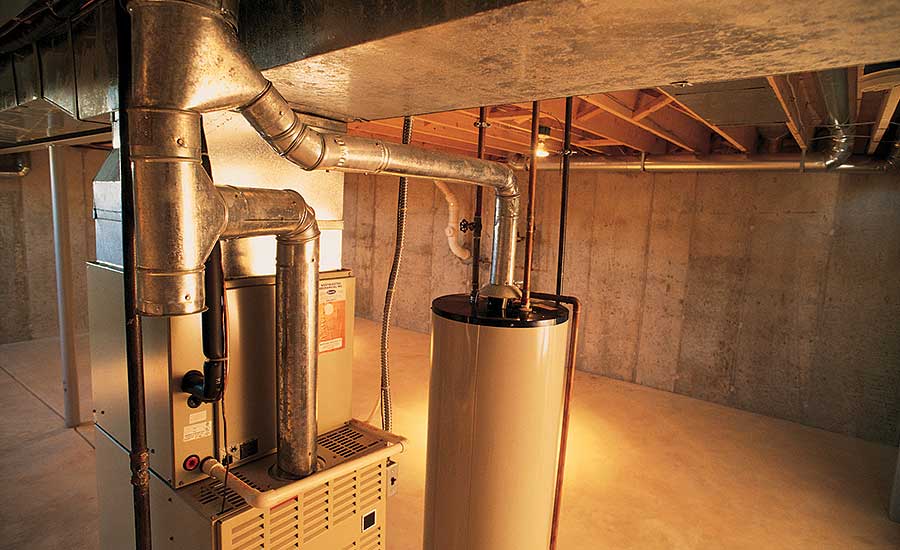
How to Install Type B Vent?
Type B gas vents are approved for use with natural gas or liquid propane category I, draft Hood appliances with inputs up to 400,000 BTU/hour. They are also approved for use with direct vent appliances that have been listed and labeled as Type B Gas Vent systems by the manufacturer.
- The first step is to purchase the Type B Vent of your choice
- You can find these at most hardware or home improvement stores
- Next, locate the vent opening on the exterior of your home
- This is typically located near the roofline
- Once you have found the vent opening, measure the diameter of the opening
- This will ensure that you purchase a Type B Vent that will fit properly
- Before installing the Type B Vent, apply a generous amount of caulk around the perimeter of the vent opening
- This will help to create a weather-tight seal
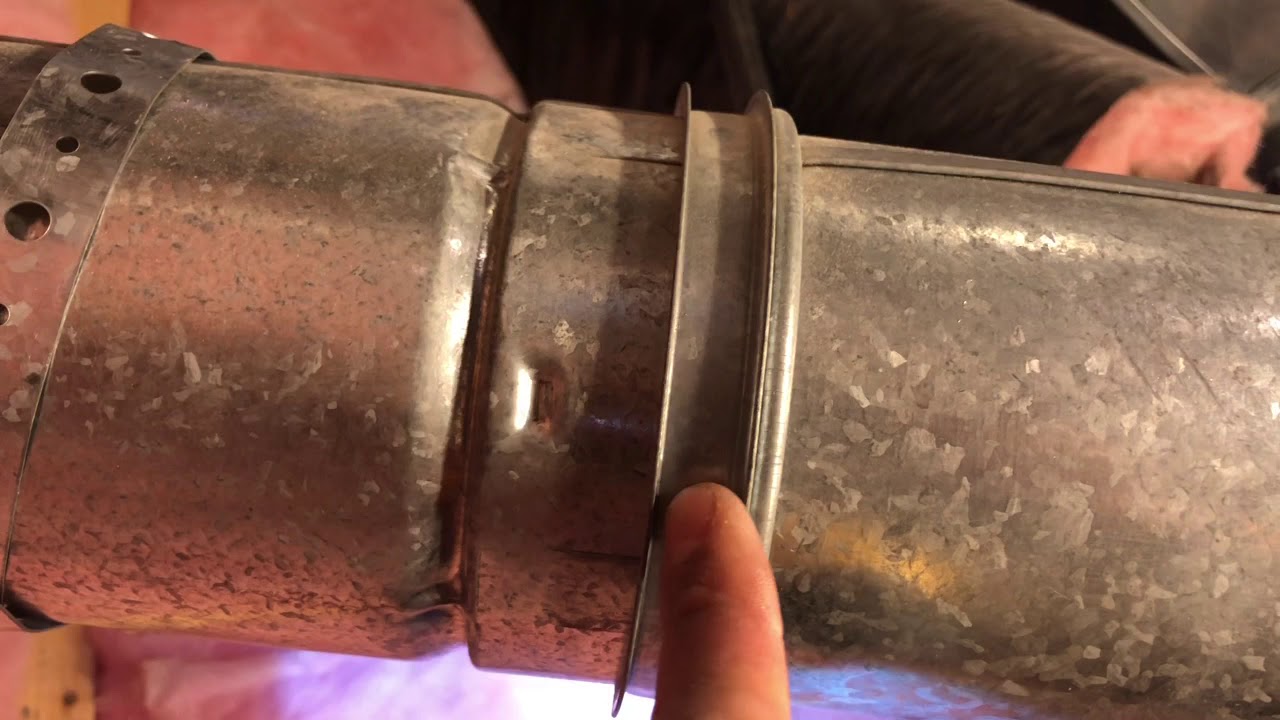
- Now it’s time to install the Type B Vent into the opening
- Start by slipping the flange (the part that goes on the outside of your home) into place and then secure it with screws or nails around the perimeter
- Next, take the pipe that will go through your attic or crawlspace and insert it into the flange from inside your home until it reaches its stopping point outside your home7
- Now it’s time to apply caulk around both sides of the pipe where it meets both sides of the flange in order to create a weather-tight seal
How to Install B Vent Through Wall
If you’re looking to install a B vent through your wall, there are a few things you’ll need to keep in mind. First, you’ll need to choose the right type of pipe for your installation. There are two types of B vents: Type B Gas Vent and Type BW Gas Vent.
The former is used for natural gas-fired appliances, while the latter is for use with propane-fired appliances. Once you’ve selected the appropriate pipe, you’ll need to measure the length and diameter of the pipe runs. Next, mark the stud locations on the wall where you’ll be installing the pipe.
Installing a B vent can be done either by drilling holes through the studs or by notching out sections of the studs. If you’re going to drill holes, make sure they’re big enough to accommodate both the inner and outer diameters of the pipe. To notch out sections of studs, use a saw to remove material from the top and bottom plates as well as any intervening vertical studs.
Keep in mind that notches should never be more than 1/3 of a stud’s width; otherwise, it weakens its structural integrity too much. Once all your preparation work is done, it’s time to start installing the pipe itself. Begin by attaching one end of the pipe to the eventhood using self-tapping screw sand sheet metal straps or banding (make sure these are also screwed into solid wood).
At least two screws should be used per 4′ section of pipe and one screw per 6″to 8″ section of banding or strap width(whichever is greater). Next, support the piper by installing suspended ceiling wires or other types soften great 24″ intervals along its length (against brewing into the wood whenever possible). You can also useplasticormetalJ-hook and nail for these into joists or framing members for additional support if needed.
Credit: www.youtube.com
How Do You Hook Up a Type B Vent?
There are a few different ways that you can hook up a Type B vent. The most common way is to use two 90-degree elbows and a straight length of pipe. You will first need to measure the distance from the top of the stove to the ceiling.
This will be the height of your vertical section of the pipe. Next, measure the distance from the back wall to where you want your horizontal section of pipe to end. This will be the length of your horizontal section of pipe.
Once you have all of your measurements, you can start putting together your pipe. Start by attaching one elbow to the top of the stove. Then, attach your vertical section of pipe to this elbow.
Measure and cut your horizontal section of pipe so that it fits between the other elbow and the back wall. Make sure that everything is level before moving on to securing everything with screws or clamps. Now that everything is in place, you can start hooking up your venting system.
First, attach one end of your flexible ductwork to the elbow on the back wall. Route this duct work along the ceiling until you reach the other side of the room where your exhaust fan is located. Attach the other end of your ductwork to the exam than and secure it in place using screws or clamps (depending on what type of exhaust fan you have).
Does B Vent Need to Be Screwed?
No, the B vent does not need to be screwed. It can be held in place with metal or plastic straps, or it can be glued.
How Far above the Roof Should a B Vent Be?
B vents are one of the most important parts of a home’s ventilation system, and it is important to make sure they are installed correctly. One of the key installation details is the height at which the B vent should be placed above the roof. The National Fire Protection Association (NFPA) has established guidelines for the minimum height that a B vent must be above a roof.
These requirements are based on both safety and performance considerations. The minimum height for a B vent above a roof depends on the type of roofing material being used. For example, if asphalt shingles are being used, the B vent must be at least 2 feet above the highest point of the roof.
If wood shingles or shakes are being used, the minimum height increases to 4 feet. For tile roofs, the minimum height is 6 feet. In addition to meeting NFPA requirements, it is also important to consider other factors when deciding how high to place a B vent above a roof.
One factor to consider is wind conditions in your area. If you live in an area with high winds, you may want to increase the height of your B vent above the recommended minimum to help ensure that it functions properly. Another factor to consider is snow accumulation on your roof in wintertime.
If you live in an area where snowfall is common, you may need to increase the height of your B vent so that it does not become blocked by snowdrifts. Installing a B vent at the correct height is crucial for ensuring that your home’s ventilation system works properly and safely. Be sure to check local building codes and follow all manufacturer’s instructions when installing your B vent to ensure compliance with NFPA requirements and optimal performance.
Can You Put Screws in B Vent Pipe?
You can put screws in the B vent pipe, but it is not recommended. The reason for this is that the screws can cause the pipe to leak. If you must put screws in the pipe, be sure to use silicone caulk or another type of sealant to prevent leaks.
How to Install B-Vent Adjustable Length (Metal-Fab)
Conclusion
Type B vent is a great way to ensure that your home is properly ventilated. By following the instructions in this blog post, you can easily install a Type B vent in your home. This will help you avoid many potential problems, such as mold and mildew growth, that can occur when homes are not properly ventilated.