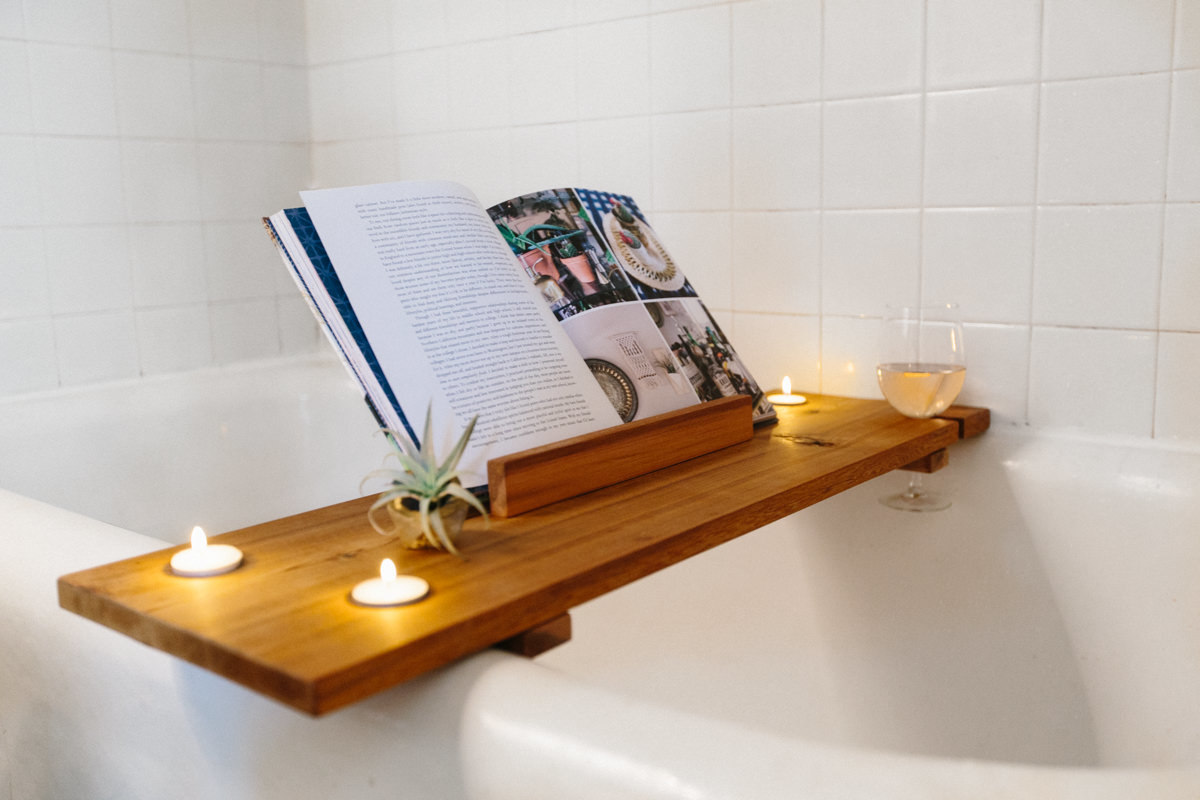
How to Make a Bath Caddy?
To make a bath caddy, you will need: – 1/2 inch Plywood – Jigsaw
– Sandpaper (80 grit) – Drill and 1/8 inch drill bit – Titebond III Wood Glue
– Clamps (at least 4) – Paint or Stain (optional)
1. Cut the plywood to size using a jigsaw. The dimensions will depend on the size of your tub. Ours was approximately 32″ x 12″.
2. Smooth the edges of the plywood with sandpaper.
3. Drill four holes in each side of the plywood, about 1″ from each edge, and evenly spaced apart. These will be for the handles.
4 . Cut four pieces of dowel rod or rebar to use as handles. Each piece should be long enough to extend beyond the width of the caddy when inserted into the drilled holes. We cut our handles to be 18″ long.
5 . Insert the handles into the drilled holes and secure them in place with wood glue. Allow the glue to dry completely before proceeding to the next step.
- Gather your supplies
- You will need a saw, drill, screwdriver, screws, sandpaper, paint or stain, and a measuring tape
- Cut two pieces of wood to the desired length for your bath caddy
- Make sure they are exactly the same length
- Drill four holes in each piece of wood, two near each end
- These will be used to attach the wood together later on
- Sand down all the edges of the wood until they are smooth to the touch
- This will help prevent splinters later on
- Paint or stain your wood pieces as desired and allow them to dry completely before moving on to the next step
- If you are using paint, you may want to apply a second coat for added durability
- Once dry, proceed to step 6
- If you are staining your wood instead of painting it, make sure that it is sealed with a clear coat before proceeding to step 6
- This will help protect it from water damage in the bathroom environment
- 6 Using screws and your drill, attach the two pieces of wood together at the drilled holes
- Make sure that they are securely attached by testing them out before moving on
- Now is also a good time to add any embellishments or decorations that you desire
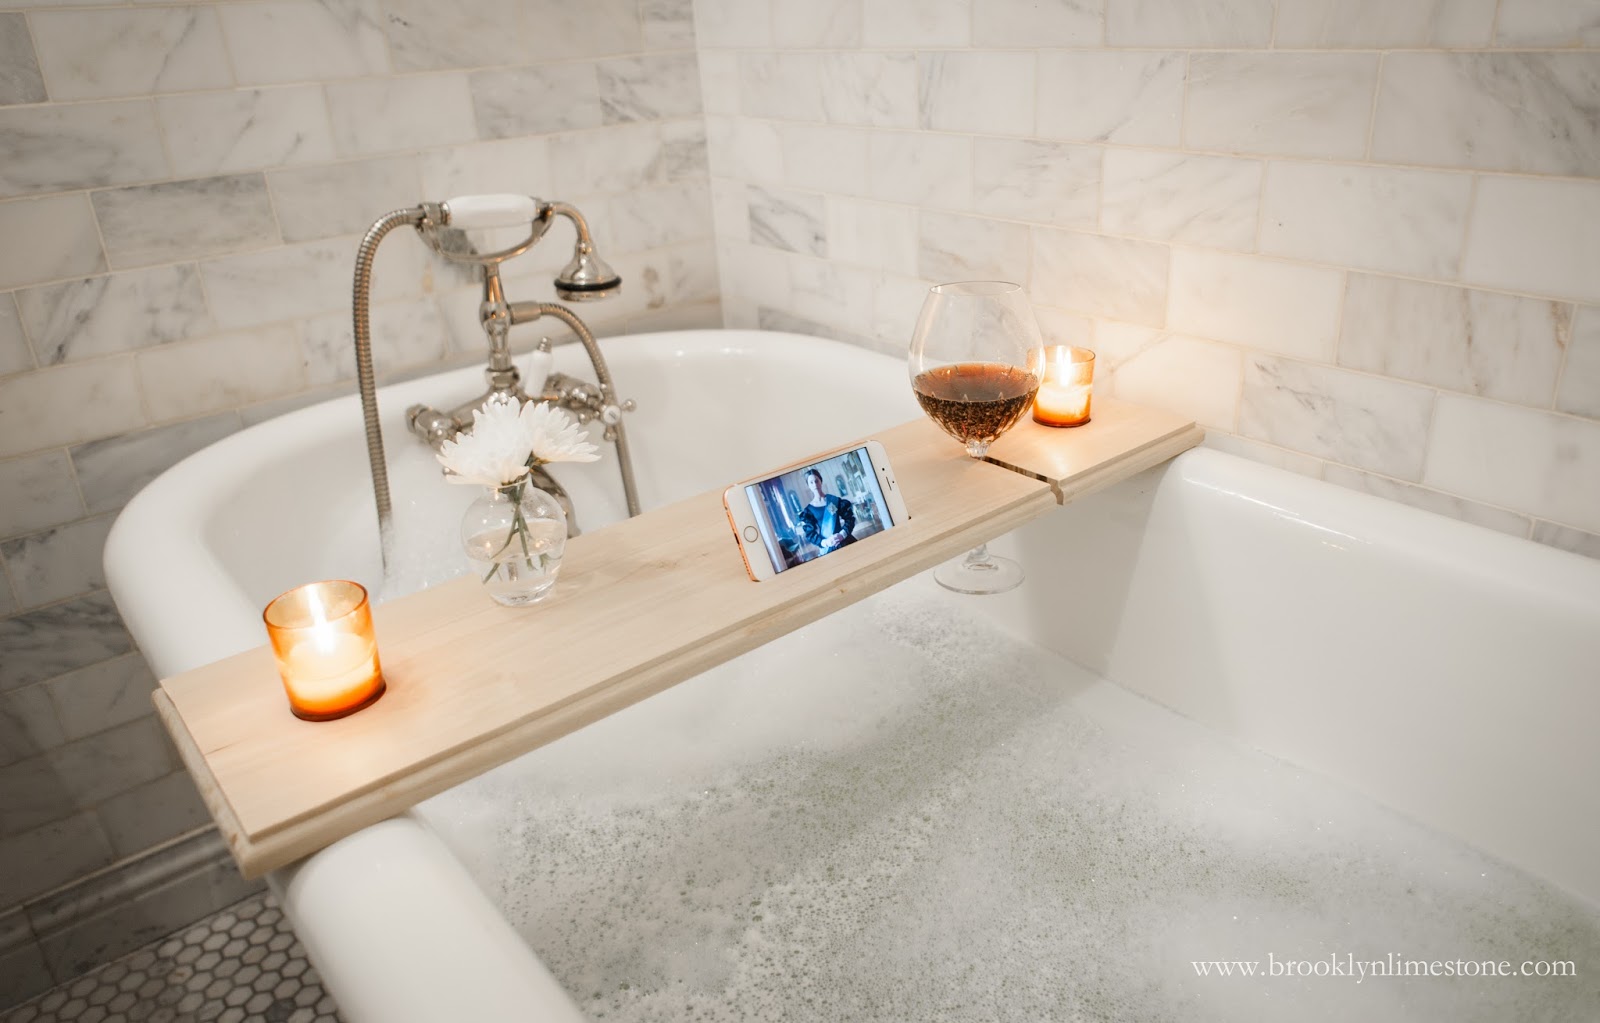
Credit: www.brooklynlimestone.com
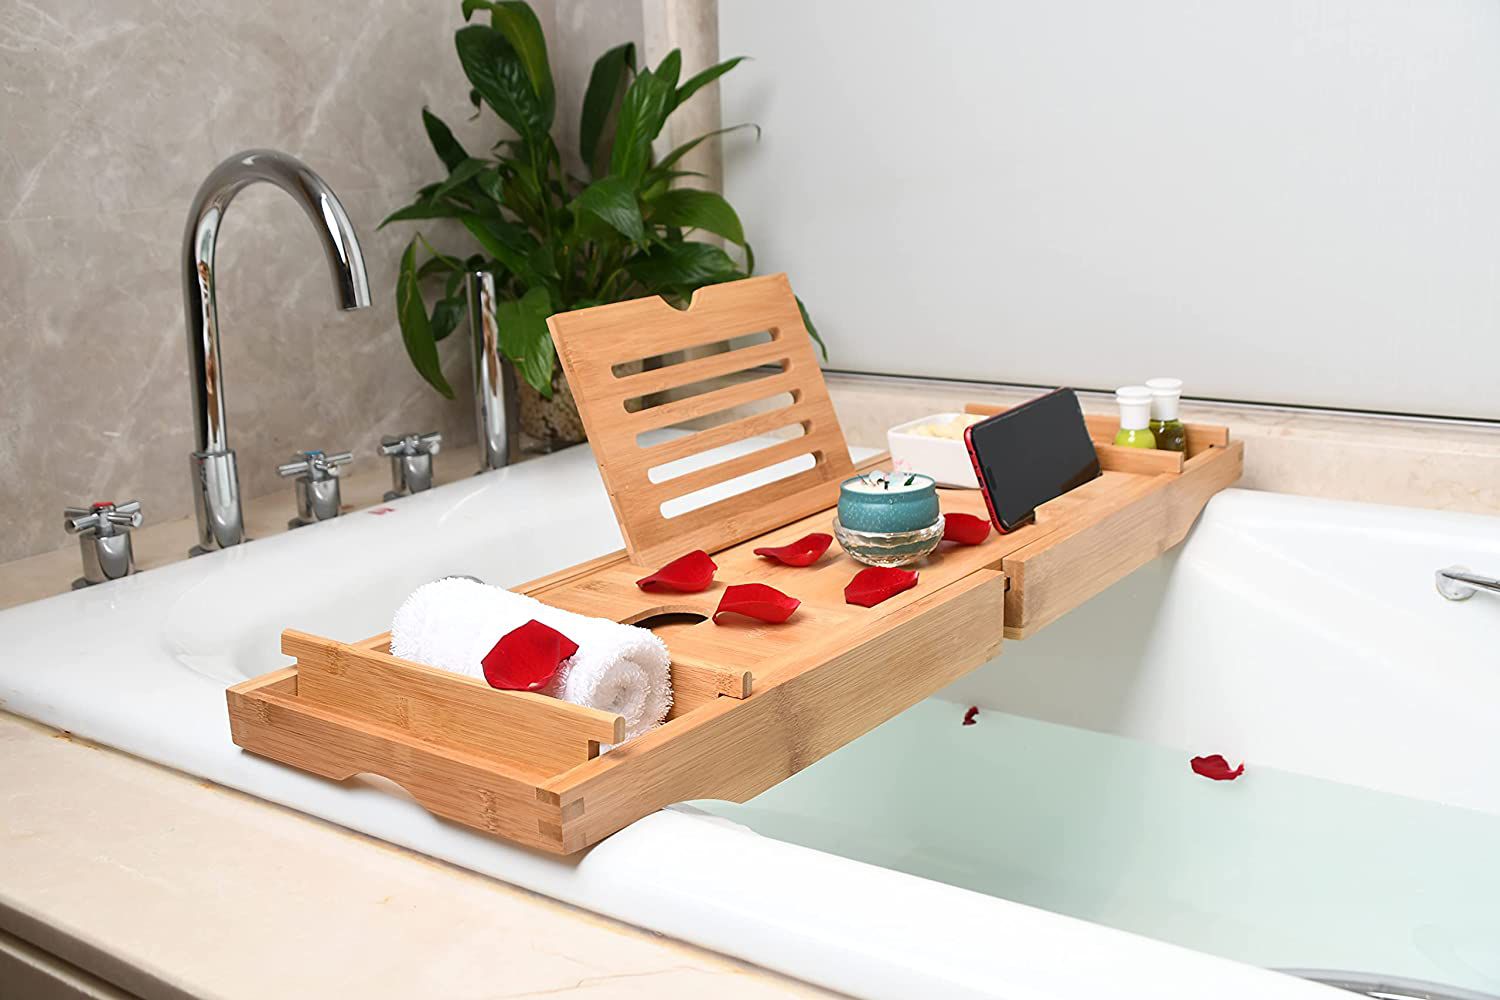
Diy Bath Tray With Phone Holder
If you’re anything like me, you love spending time in the bathtub. It’s the perfect place to relax and unwind after a long day. But there’s one thing that can ruin a nice relaxing bath: having to constantly reach for your phone or tablet to check notifications, answer texts, or just scroll through social media.
That’s why I decided to make my own bath tray with a built-in phone holder. This way, I can have my phone right next to me while I’m soaking in the tub without having to worry about it getting wet. Plus, it’s super easy to make!
Here’s what you’ll need: -1 piece of wood (I used a 1×4) -1 plastic cup or jar (for holding your phone)
-4 small L-brackets

Credit: www.youtube.com
How to Make Your Own Bathtub Caddy?
A bathtub caddy is a great way to keep your bathroom organized and tidy. It can also help you save space by keeping all of your bath items in one place. If you are looking for a way to make your own bathtub caddy, here are some easy instructions.
First, you will need to gather some supplies. You will need a piece of wood that is at least 24 inches long and 12 inches wide. You will also need four L-shaped brackets, screws, washers, and a drill.
Once you have all of your supplies, it’s time to get started! To begin, drill four holes into the piece of wood. These holes should be evenly spaced and should be large enough to fit the L-shaped brackets through them.
Next, attach the L-shaped brackets to the wood using screws and washers. Make sure that the bracket is flush with the edge of the wood so that it doesn’t stick out. Now it’s time to add some shelves!
To do this, simply screw some more L-shaped brackets into the wood where you want your shelves to go. Then, cut pieces of plywood or particle board to fit on top of these brackets. Finally, add any finishing touches like paint or stain before using your new bathtub caddy!
What is the Best Material for a Bath Caddy?
There are a few different materials that can be used for bath caddies, but the best material is definitely bamboo. Bamboo is a sustainable material that is both durable and beautiful. It will not warp or splinter like other materials, and it’s also antibacterial.
Bath caddies made out of bamboo are the perfect way to organize your bathroom and keep all of your toiletries within reach. They come in a variety of sizes and styles to fit any space, and they make a great addition to any bathroom decor.
What is the Best Wood for a Bath Caddy?
There are a few things to consider when choosing the best wood for a bath caddy. Hardness, durability, and moisture resistance are important factors to keep in mind. Some of the best options include teak, mahogany, or bamboo.
Each option has its own unique benefits that make it ideal for use in a bathroom setting. Teak is an excellent choice for its high degree of hardness and natural resistance to water damage. Mahogany is another great option for its attractive grain pattern and impressive strength.
Bamboo is a popular choice for its eco-friendly credentials and stylish appearance. Ultimately, the best wood for a bath caddy depends on your specific needs and preferences.
Credit: www.verywellmind.com
How Wide Should a Bath Caddy Be?
Assuming you are referring to a bathtub caddy, they range in size from 24 inches to 34 inches. The most popular width is 29 inches.
How to Build a Bath Caddy and Tablet Holder Combo
Conclusion
If you’re looking for a way to spruce up your bathroom and make it more functional, try making a bath caddy! A bath caddy is a great way to keep all of your essential bathroom items organized and within reach. Plus, it makes baths feel even more luxurious.
All you need to make a bath caddy is some wood, screws, and hooks. Follow the instructions in this blog post and you’ll have a brand-new bath caddy in no time!