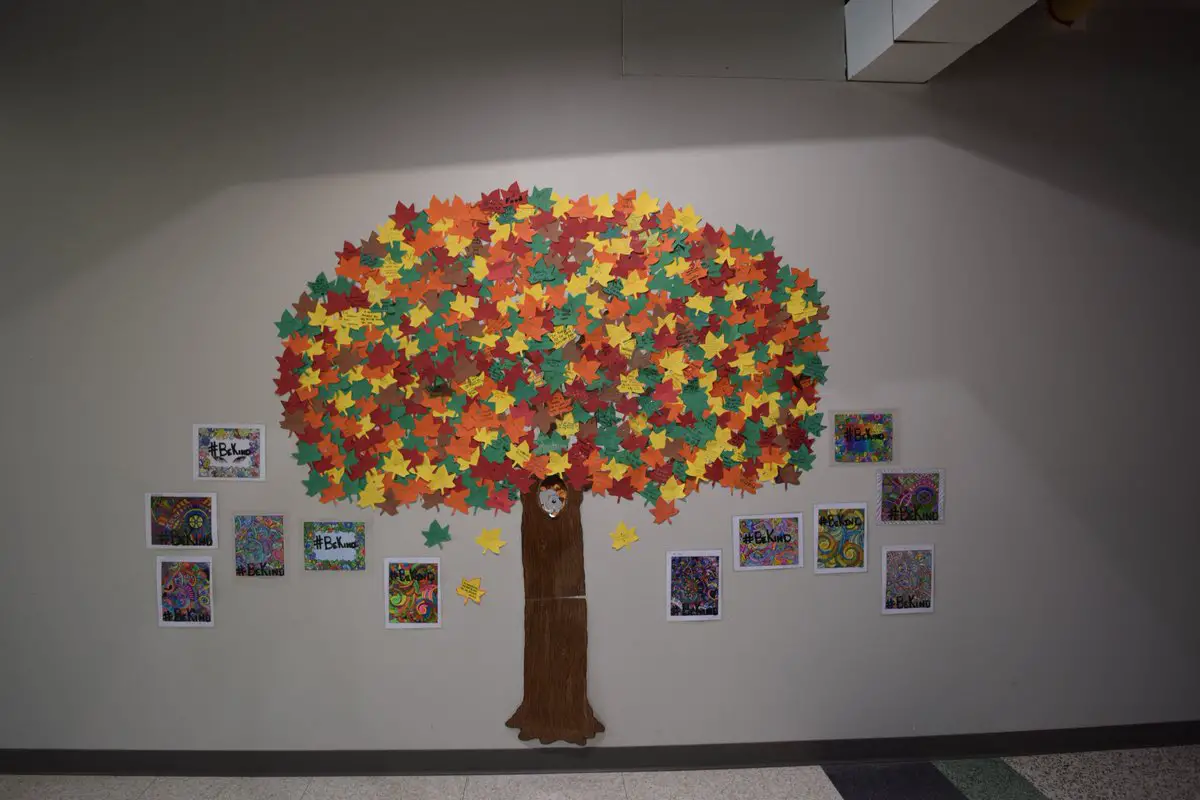
How to Make a Paper Tree for Classroom Wall
Making a paper tree for a classroom wall is a fun and easy project that can be done in the afternoon. All you need is some construction paper, scissors, and glue. First, cut out the tree trunk and branches from the construction paper.
The trunk should be about two feet long and the branches should be about one foot long. Next, cut out leaves from the construction paper. You will need about 50 leaves for this project.
Once you have all of your pieces cut out, it’s time to start assembling your tree. Start by gluing the trunk to the wall. Then, begin attaching the branches to the trunk.
Make sure to space them evenly apart. Lastly, attach the leaves to the branches with glue or tape. Your paper tree is now complete!
- Create a template for your tree
- Draw a large tree shape on a piece of paper, or use a pre-made template
- Cut out the tree shape from the paper
- Trace the tree onto a piece of construction paper, and cut it out
- This will be the background for your tree
- Decorate your tree however you like! Use crayons, markers, glitter, sequins, etc
- to make it unique
- Hang your finished tree up on the classroom wall for everyone to enjoy!
How Do You Make a Paper Tree Out of Classroom?
To make a paper tree out of the classroom, you need the following materials: -A4-sized Paper -Scissors
-Glue or tape -Markers or crayons (optional)
- Start by folding your A4 paper in half lengthwise. Then fold it in half again. You should now have a long, thin rectangle.
- Cut along the folded edge to create a fringe. Make sure not to cut all the way to the end!
- Starting from the top corner, begin rolling your paper up tightly until you reach the end.
- Once you reach the end, glue or tape your rolled-up paper to secure it.
- Spread out your “tree” and decorate it with markers or crayons if desired!
How Do You Make Paper Trees Step by Step?
Making paper trees is a fun and easy way to spruce up any room or office space. Plus, they make great gifts! Here’s how to make your own paper tree step-by-step:
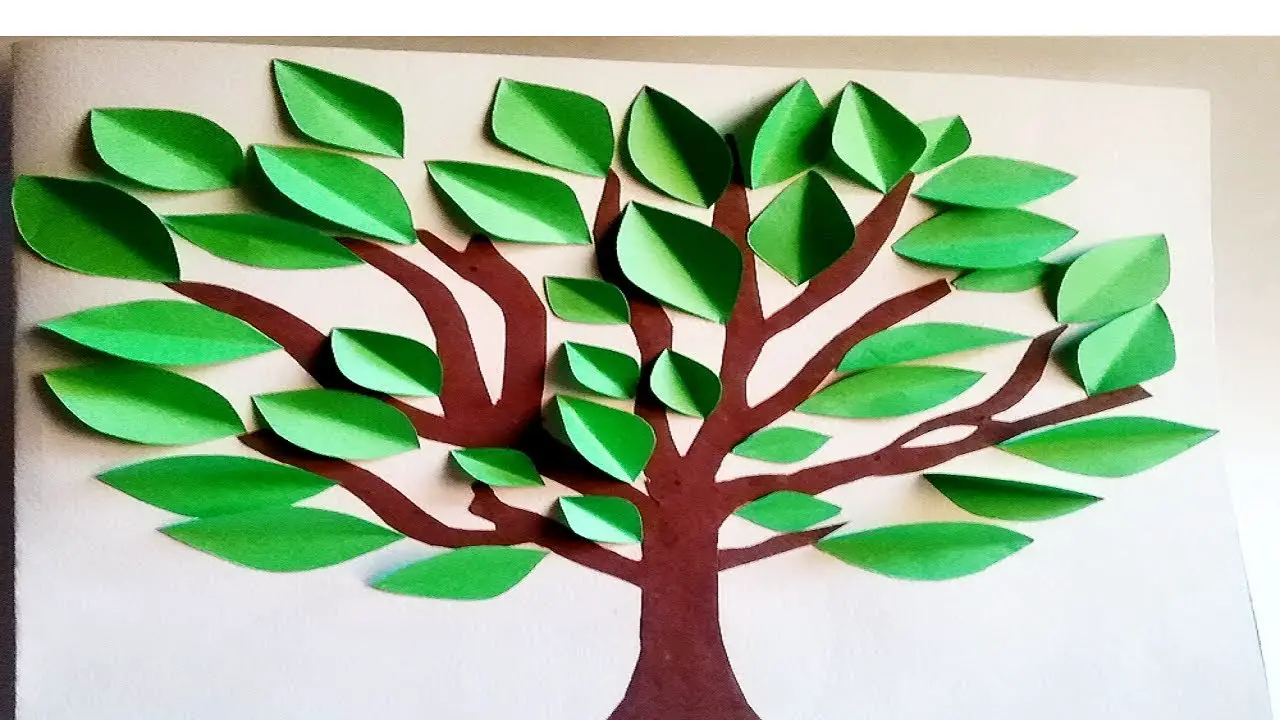
- Start by cutting out a tree trunk and branches from brown construction paper. If you want your tree to be extra sturdy, use cardstock instead.
- Next, cut out leaves from green construction paper. You can also use other colors of paper if you want your tree to be more festive!
- To assemble your tree, glue the trunk and branches onto a piece of white construction paper or poster board. Then, glue the leaves onto the branches.
- Once everything is dry, display your beautiful paper tree for all to see!
How Do You Make a Simple Paper Craft Tree?
One of the most classic and simple paper craft projects is creating a paper tree. This can be done with just a few supplies including construction paper, scissors, and glue. First, cut out various-sized triangles from the construction paper.
These will be the tree’s leaves. Next, take one triangle and glue it to the center of another triangle, slightly overlapping the edges. Continue this pattern until all of the triangles are glued together in a pyramid shape.
Then, cut a thin strip of construction paper for the tree trunk and glue it to the bottom of the pyramid. Your paper tree is now complete!
Credit: www.youtube.com
How Do You Make a 3-Dimensional Tree Out of Paper?
To make a 3-dimensional tree out of paper, you will need to start with a square piece of paper. Fold the paper in half diagonally to create a triangle. Then, fold the triangle in half again to create a smaller triangle. Cut along the folded edge to create two triangular pieces of paper. Take one of the triangles and fold it in half again. Then, cut along the folded edge to create two smaller triangles.
Repeat this step with the other triangle. You should now have four small triangles. Take one of the small triangles and fold it in half again.
This time, only fold it halfway so that you have a triangular pocket. Repeat this step with the remaining three small triangles. Now take one of the pockets and insert another pocket inside it so that they are nested together. Do this with the remaining pockets until all four are nested together in a pyramid shape. Tape or glue the pockets together at their points of contact if desired. Your 3-dimensional tree is now complete!
To add some extra flair, you can decorate your tree with sequins, glitter, or whatever else you like!
Credit: diyways.com
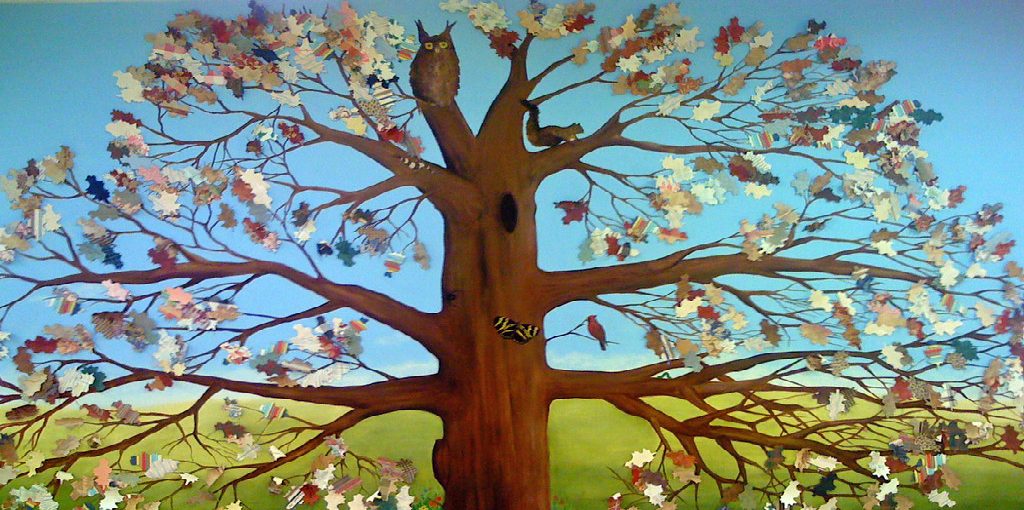
How to Make a Tree on the Wall
In order to make a tree on the wall, you will need the following supplies: -A large piece of paper or poster board -Scissors
-Tape -Markers or crayons First, use the scissors to cut out a tree shape from the paper.
If you want, you can also cut out leaves from another color of paper. Next, use tape to attach the tree shape to the wall. You can then decorate your tree with markers or crayons.
Add as many details as you like!
DIY Paper tree wall decoration ideas/Paper tree with flowers/Classroom tree wall decoration idea
Conclusion
In this post, the author provides step-by-step instructions for how to make a paper tree for a classroom wall. First, the author draws a tree trunk and branches on a sheet of brown construction paper. Next, the author cuts out green leaves from another sheet of paper.
The leaves are glued to the branches, and then the entire tree is hung up on the wall. This project is perfect for classrooms because it is simple, cheap, and cheerful!