How To Make A Deer Skin Rug
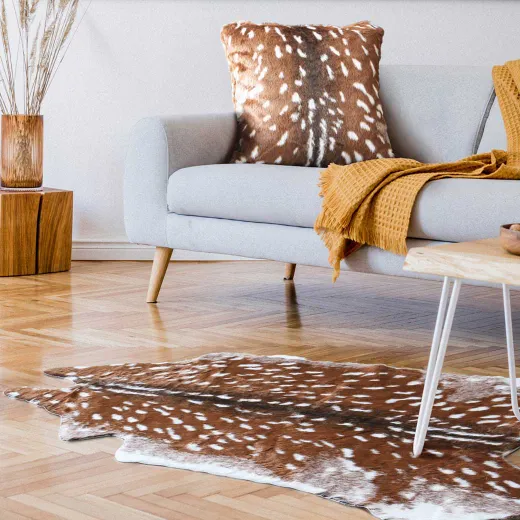
Deerskin rugs are a luxurious and unique addition to any home. Not only are they attractive and stylish, but they can also be used to add warmth and texture to a room. Making a deer skin rug is a fun and relatively easy process that can be done with minimal supplies. With the right tools and a bit of patience, you can create a beautiful and unique piece for your home that will be a conversation piece for years to come. With this guide, you will learn all the steps necessary to make a deer skin rug.

Materials Needed
Making a deer skin rug is an excellent way to create a unique, rustic piece for your home. The process may seem daunting at first, but with the right materials and a detailed step-by-step guide, anyone can make a beautiful deer skin rug. In order to make the rug, you will need a deer hide, a razor blade, a pair of scissors, leather needles, thread, salt, and a heavy object.
The deer hide should be from a deer that has been properly processed and is free of any damage. The razor blade will be used to scrape the hide and remove any remaining flesh and fat. The scissors will be used to cut the hide to the desired size and shape. Leather needles and thread will be used to stitch the edges of the hide and to hold them in place. Salt should be used to ensure the hide does not rot or decay. Lastly, a heavy object will be needed to weigh the hide as it dries.
Once you have gathered the necessary materials, you can begin the process of turning a deer hide into a rug. With the right materials and a bit of patience, anyone can make a beautiful and unique deer skin rug to add to their home.
Preparation of the Deer Skin
Making a deer skin rug is an art form that requires patience and skill. The first step is to properly prepare the deerskin for the rug. This involves cleaning and de-airing the hide, as well as softening it and removing any excess fat or tissue.
The cleaning process involves soaking the hide in a solution of warm water and detergent. This helps to remove any dirt or debris that may be stuck in the hide. After cleaning, the hide must be de-haired using a tool such as a wire brush or a pumice stone. Once the hair is removed, the hide must be softened by soaking it in a solution of warm water and oil.
Once the hide is softened, any excess fat or tissue must be removed. This can be done with a sharp knife, although care should be taken not to damage the hide. After the fat and tissue are removed, the hide must be dried thoroughly. This can be done by hanging the hide in a warm, dry place or by using a fan.
Once the hide is dry, it is ready to be used to make the rug. It is important to remember that the quality of the hide is important, so it is important to ensure that the hide is well-prepared before using it. With proper preparation, the hide can be used to make a beautiful and long-lasting rug.
Tanning the Skin
Tanning the skin is the final step in making a deer skin rug, and it’s an important one. To tan the deer hide, you’ll need to use a safe tanning solution that won’t damage the hide. Tanning solutions may include a combination of chemicals and preservatives, such as alum, salt, and formaldehyde. Once the hide has been soaked in the solution, it needs to be rinsed and dried. This process can take multiple days and may need to be repeated several times. After the hide is tanned, it should be soft and pliable. Once it’s tanned, the hide is ready to be made into a rug.
Measuring and Cutting the Skin
Making a deer skin rug is a great way to add a unique and rustic look to any home or cabin. Once you’ve acquired the deer skin, the first step in the process is measuring and cutting the skin. You’ll want to make sure you have the right size for your rug, so measure the space you’re planning to use the rug in. You’ll also want to measure the deerskin and make sure it’s large enough to fit the space. Once you have the measurements, use a sharp hunting knife to cut the skin along the measurements. Make sure you’re cutting from the top of the hide down, as this will help preserve the fur. Once you’ve cut the skin to the right size, you’re ready to move on to the next step of making your deer skin rug.
Sewing the Pieces Together
Creating a deer skin rug from scratch requires a lot of patience and skill. After the deer hide has been properly tanned and the pieces cut, it’s time to sew the pieces together. The best way to go about this is to use a strong, waxed thread and a curved needle that’s specially made for leather crafting. This will make it easier to sew through the thick hide. Once the pieces are connected, it’s important to ensure that the edges are properly secured. This can be done by using a stitching awl, which is a tool specifically designed for leather crafting. With this tool, you can make a series of small holes along the edge of the hide and then stitch the pieces together. This will ensure that the edges are firmly secured and that the rug will last for years to come. After the stitching is complete, you can add a decorative finish to the edges with an edge beveled. This will give the rug an extra polished look, making it a work of art.
Attaching the Skin to the Base
The next step in making a deer skin rug is to securely attach the skin to the base. To do this, you will need to use a needle and some strong thread. You should start by making small stitches along the bottom of the skin so that it is securely fastened to the base. As you progress, you should gradually move up the sides of the skin, making sure to keep the stitches as close together as possible. You should also make sure that the stitches are evenly spaced, to ensure the skin is held firmly in place. Once all the edges are secured, you will have a beautiful and durable deer skin rug.
Finishing Touches
Finishing touches are what will make or break a deer skin rug. After the skin has been properly tanned, it’s time to assemble the rug. Start by cutting the skin into the desired shape and size. Depending on the size of the rug, you may need to use more than one skin. Once the skin is cut, use an adhesive to attach the pieces together. When attaching multiple pieces, be sure to overlap the skins by at least an inch. Once all the pieces are in place, use a heavy-duty sewing machine to stitch together the edges. If you don’t have a sewing machine, you can hand-stitch the edges. For a more polished look, add decorative trims, tassels, or other adornments. With some patience and skill, you can make a beautiful deer skin rug that will last for many years.
FAQs About the How To Make A Deer Skin Rug
1. What materials do I need to make a deer skin rug?
Answer: You will need a deer hide, a sharp knife, salt, a wooden mallet, a utility knife, and a heavy-duty sewing machine.
2. How do I prepare the deer skin?
Answer: Soak the hide in salt water for several hours. After it is fully saturated, use a sharp knife to scrape away any fat, meat, or fur from the hide.
3. How do I tan the hide?
Answer: After the hide is prepared, you will need to tan it using a commercial tanning solution. Follow the instructions on the product for the best results.
Conclusion
Making a deer skin rug is a rewarding and unique craft project that requires patience and technique. With the right preparation and knowledge, it is possible to make a truly beautiful and distinctive rug that adds a touch of rustic elegance to any home. Using the right materials and tools, it is possible to create a stunning deer skin rug that will be a conversation piece in any home.

