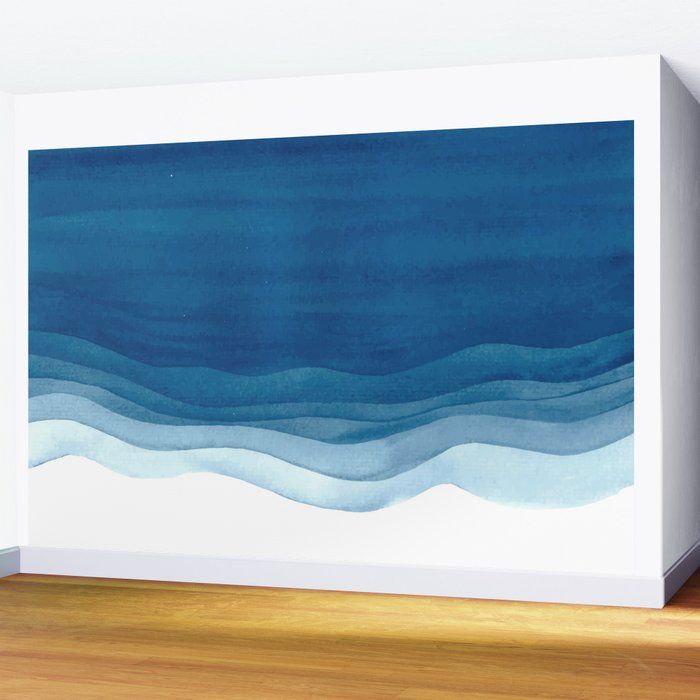
How to Paint Waves on Wall
Waves are one of the most popular subjects for painting, as they can be both calming and invigorating. Many people choose to paint waves on their walls as a way to bring the outdoors inside, or simply because they enjoy the look of waves. While painting waves may seem daunting, it is actually quite simple with a few tips and tricks.
- Begin by painting the entire wall one solid color as your base
- Once the base coat is dry, use a large round brush to paint wavy lines in a second color on top
- To add more dimension to the waves, use a smaller brush to paint yet another shade on top of that
- Finally, use a sea sponge to lightly dab white paint along the crest of each wave for added realism
How to Paint Waves Easy Step by Step
In this easy step-by-step guide, we’ll show you how to paint waves that look realistic and beautiful. We’ll start by discussing the supplies you’ll need and then walk you through each step of the painting process. By the end, you’ll be able to create your own stunning ocean scenes.
One of the most difficult things about painting waves is getting the colors right. The best way to achieve realistic colors is to use a blue or green base color and then add white to lighten it up. You can also experiment with different shades of blue and green to find the perfect hue for your painting.
Once you have your base color mixed, it’s time to start painting! The first thing you need to do is wet your brush with water and then load it up with paint. Next, begin at the top of your paper and make a series of curved lines that come down toward the bottom.
These lines will represent the crest of the waves. Make sure that each line is slightly different in size and shape so that they look natural. Once you’ve created the crest lines, it’s time to fill in the rest of the wave.
To do this, simply continue making curved lines that connect all of the crest lines together. As you’re doing this, vary the pressure on your brush so that some areas are darker than others. This will give your waves more dimension and make them look more realistic.
Finally, once you’re happy with how your waves look, go over them one last time with a clean brush dipped in water.
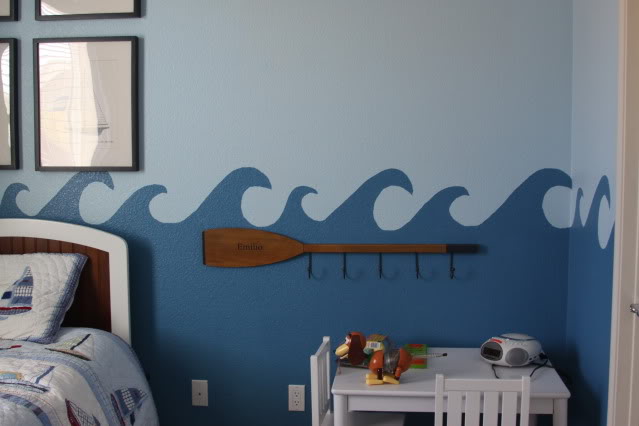
How Do You Paint a Wave on the Wall?
How do you paint a wave on the wall? You can use a variety of techniques to paint waves on your walls. One popular way is to use a sponge or rag to create a rippling effect.
Another technique is to use a brush to create long, sweeping strokes. You can also experiment with different colors and shades to create unique effects.
How Do You Make Paint Look Like Waves?
To make the paint look like waves, you will need to create a gradient effect. Start by painting the bottom of the canvas with a light blue color. Then, using a darker blue, paint the top half of the canvas.
To create the waves, start in the middle of the canvas and use a circular motion to create swirls. Work your way outwards until you reach the edges of the canvas.
How Do You Paint Waves for Beginners?
Are you interested in painting waves, but don’t know where to start? Here are some tips for painting waves for beginners.
1. Start with a pencil sketch. This will help you map out the composition of your painting and get a feel for the flow of the waves.
2. Choose your colors. For a realistic wave painting, use a blue or green color palette. You can also experiment with other colors to create a more abstract design.
3. Paint the sky first. Begin by adding a layer of light blue or green paint to represent the sky behind the waves.
4. Add the waves next. Use curved brushstrokes to paint the shape of the waves crashing onto the shoreline. Work from light to dark, using different shades of blue and green to create depth and dimensionality.
5 Take your time and have fun! Painting waves can be challenging, but it’s also rewarding.
How Do You Paint Good Waves?
There’s no definitive answer to this question – it depends on what kind of waves you’re trying to paint, and what your personal style is. But there are some general tips that can help you create realistic-looking waves in your paintings. First, consider the direction of the waves.
The vast majority of waves will be moving from left to right (assuming you’re painting a scene with the horizon line in the middle), so make sure your brushstrokes reflect that. Start at the top of the wave, and sweep your brush down and to the right in a fluid motion. As you get closer to the bottom of the wave, apply more pressure to your brush so that the strokes become thicker and more pronounced.
Next, think about the color of your waves. If they’re lit by the sun, they’ll likely have warmer hues like yellow or orange. If they’re in shadow, they’ll be cooler shades like blue or purple.
And if you want to create a really dramatic effect, try using contrasting colors for different parts of the wave – for example, a bright white crest against a dark blue body. Finally, don’t forget about texture! Realistic waves have foamy tops and smooth bottoms – mimicking this effect with your brushwork will add another layer of realism to your painting.
Softer brushes work best for creating foam; just make sure not to overdo it or it will start to look unrealistic. With these tips in mind, go forth and paint some beautiful waves!
How To Paint Waves – Lesson 1 – Shape
Conclusion
A step-by-step guide on how to paint waves on your wall. You will need a few supplies including blue and white paint, a sea sponge, and some patience. First, sketch out your design with a pencil on paper.
Next, use blue paint to create the base layer of your waves. Once the base layer is dry, add in the white paint using the sea sponge. Finish up by adding any details you desire!